
You’ve noticed it, haven’t you? That faint draft whispering through your living room on a chilly evening. Or perhaps it’s the drumming of rain against your front door that seems to carry directly into your hallway, even when it’s firmly shut. Your old front door, the sturdy sentinel that guards your home, might be letting you down, and a significant culprit is likely your weatherstripping. It’s easy to overlook this unassuming hero, but worn, cracked, or improperly installed weatherstripping is a primary reason you’re losing energy, enduring discomfort, and, yes, potentially even increasing your utility bills. It’s time to address this overlooked area and upgrade your old front door with the best weatherstripping available.
Why Your Front Door Needs Better Weatherstripping
Your front door is more than just an entryway; it’s a crucial barrier between the controlled environment of your home and the unpredictable elements outside. When this barrier is compromised, the consequences can be far-reaching. Think of it as a chain reaction. A draft doesn’t just feel cold; it forces your heating system to work harder to compensate. This not only wastes energy but can also lead to uneven temperatures throughout your home.
The Hidden Costs of Poor Weatherstripping
- Increased Energy Bills: This is the most immediate and tangible consequence. When warm air escapes during winter and cool air escapes during summer, your HVAC system has to run more frequently and for longer periods to maintain your desired temperature. This translates directly into higher electricity and gas bills. You might not realize how much energy is being lost until you quantify it. A surprisingly small gap can lead to a significant amount of wasted energy over a year.
- Reduced Comfort: Beyond the financial aspect, consider your personal comfort. Those persistent drafts can make specific areas of your home feel perpetually chilly, even with the thermostat set to a reasonable temperature. Conversely, in the summer, hot air seeping in can make your home feel stuffy and uncomfortable, driving up your air conditioning costs.
- Compromised Security: While not always the primary focus, degraded weatherstripping can also subtly impact your door’s security. A loose or damaged seal might allow for slight movement in the door, potentially making it easier for an intruder to force entry. It’s a small detail, but in the overall security of your home, every layer of protection matters.
- Moisture and Pest Intrusion: Gaps in your weatherstripping can allow moisture to seep into your home, potentially leading to water damage, mold growth, and rot around your door frame. This is particularly problematic in areas with heavy rain or snow. Furthermore, these openings can serve as convenient entry points for insects and small pests.
- Noise Intrusion: Beyond the practical issues, you might find that your old weatherstripping does little to dampen outside noise. Sounds from traffic, neighbors, or even just the wind can penetrate your home more easily, reducing the peace and quiet you expect within your own walls.
When considering the best weatherstripping for an old front door, it’s essential to also think about the overall maintenance of your home, including the cleanliness of your exterior surfaces. For instance, an article on the best electric pressure washers can provide valuable insights into keeping your home looking its best while ensuring that your weatherstripping remains effective. You can read more about it in this informative piece: 10 Best Electric Pressure Washers for Effortless Cleaning – Our Top Picks.

- No light penetration: Our door seals are made of high-density foam core material, which effectively blocks light from penetrating around the door.
- Lower Energy Costs: This weather stripping protects your home from air leakage in both winter and summer, while increasing comfort and saving energy.
- Fits Most Doors: Door seal strip are flexible to fit slots from 0.35" to 0.59" and will fit most doors. Please check the slot you need to seal before ordering.
- Easy to Install: The door seal requires no adhesive and will not leave marks. Simply insert the door strips into the grooves or recesses to complete a tight seal that will not fall off easily.
- Enhance Your Living Space: The weather strip offers good resilience and sound insulation, effectively sealing gaps to block dust, water, and reduce noise, creating a comfortable and serene living environment.

- KERF SLOT ONLY DESIGN: This door seal is made exclusively for door frames with pre-cut kerf slots, press-in installation requires no adhesive, it does not work on flat or non-kerf doors, please confirm your door frame has a kerf slot before purchasing to ensure a proper fit
- Extra Long Coverage: With a total length of 40 feet, this weather stripping is ideal for various door sizes, it fits 1/8 inch grooves and seals gaps from 1/4 inch to 1/2 inch. Measure groove size before purchasing
- Durable PVC Flange: Our kerf door seal includes a rigid PVC flange for secure attachment to grooved door frames. The tear-resistant PE cover and high-resilience PU foam provide long-lasting durability and flexibility, ensuring a consistent seal in all temperatures
- Hassle-Free Installation: No adhesive needed—simply measure, cut, and insert the flange into the groove for a tight seal that stays in place
- Versatile Protection: Perfect for replacing old weather stripping, it blocks noise, light, rain, dirt, wind, and more. Keep your home warm in winter, cool in summer, and reduce energy costs

- BLOCK DRAFTS EFFECTIVELY - High-quality door draft stopper made from industry-grade silicone with exceptionally strong adhesive. Our door sweep for the bottom of doors puts an end to all draft problems, cold air, and dust (for exterior doors and indoors). Size: 2” H x 39” L
- SAVE MONEY AND ENERGY - Our bottom door seal blocks thermal bridges effectively. This under door seal perfectly blocks both cold air and heat transfer, keeping your home comfortable and saving you money on energy expenses.
- INSTALLS IN UNDER 1 MINUTE - To install our door draft stopper just clean the door surface, pull back the adhesive strip, and attach the door sweeper for bottom of door to the lower door. As needed, any protruding door seal can be simply trimmed away. Fast and easy!
- PERFECT FOR ANY SURFACE - Our special exceptionally strong adhesive works on any surface. It offers a rock-solid grip. Our door weatherstripping can be easily removed without damaging your door if needed. Weatherstrip made for outdoor and indoor use.
- REDUCE AMBIENT NOISES - Thanks to its thick 3d chambers, our door gap filler insulation strip brings in the added bonus of reducing sounds and external noise. Say goodbye to unwanted sounds and embrace a more peaceful home environment.

- Extra Long Size: You'll get a 33FT door weather stripping (1/2in x 1/4in). Easy to install, no tools needed, cut to any length
- High-Density CR Foam & Neoprene Rubber: Eco-friendly, non-toxic foam weather stripping with superior weatherproofing, shock absorption, soundproofing, and heat insulation
- Upgrade the Powerful Adhesive: Upgraded door weather stripping adhesive ensures reliable sealing, and waterproofing, wipe the door frame clean before sticking, there is no need to worry about it peeling off
- Energy Saving & Versatile: Door insulation seals gaps to maintain warm indoor temperatures in winter and cool indoor temperatures in summer, cutting energy costs. It is ideal for doors, windows, vents, AC, vehicles, and handicrafts
- Premium Service: We are confident in offering a 100% Satisfaction Guarantee. If you have any questions about weatherstripping for doors, contact us and we will solve it for you within 24 hours

- [Newly upgraded mesh adhesive]: The upgraded mesh adhesive ensures the longest adhesion, is easy to operate, and is highly prone to peeling and sticking. Moreover, the presence of grid lines can ensure that the adhesive is firmly attached to the strip without leaving any traces
- [Flexible variability]: It is soft and larger, larger than the common foam strips on the market. Random cutting has more flexible usability, no longer worrying about gaps that are too large to fill, waterproof and thermal insulation, ensuring comfort for families
- [100% EVA material]: Compared with silicone and EPDM materials on the market, silicone has higher density, better toughness, longer lifespan, and relatively strong temperature resistance. Raw materials are more expensive, ensuring quality while also being more aesthetically pleasing
- [Multiple application scenarios]: Doors/windows/ventilation openings/air conditioners/refrigerators/refrigerators/cars/RVs/table corners/sofa legs/trays/machine tools/garages, there are only places you can't think of, there are no places it can't use.
- [Multi purpose]: sealing/anti-collision/shaking/anti friction/anti-collision/protecting table corners/floor mats/insulation/sound insulation/light blocking, super strong adhesion suitable for various places, replacing old sealing strips is also a good choice
- 【THICKENED SILICONE MATERIAL - COMPLETELY BARRIERING AIR AND NOISE】:The weather stripping is made of thickened TPE material with good sealing and anti-deformation properties, with this weather stripping you can completely seal the gaps, keep the room warm in winter and cool in summer, Helps To Reduce Energy Consumption ,and blocking the entry of noise, light, rain, dust, wind, leaves, snow, and odor, and no reptile will sneak in.
- 【CUSTOMIZABLE IN A VARIETY OF SIZES】This weatherstripping is easy to customize, can be cut to size with scissors, and can be easily bent into any shape. Overall length 50 feet, width: 0.35 inch; thickness: 0.23 inch; fits gaps and spacing from 0.1 to 0.22 inch.NOTE: Please measure the width of the gap before purchase
- 【STRONG ADHESION - WON'T FALL OFF】This door weather stripping is covered with a strong adhesive substance. Simply remove the red film from the surface and install. After 24 hours of bonding, everything is securely bonded and there is no need to worry about peeling or adhesive residue, ensuring that this door seal strip in place long after use (and is no longer affected by extreme temperatures).
- 【EASY INSTALLATION】Measure the length of the groove to be sealed, cut the Universal Weatherstrip to the desired length, clean and dry the surface, and insert the Soundproof Weatherproof Weather strip into the groove.(Note:Low Temperature Will Result In Poor Adhesive Performance,Please Use A Hair Dryer To Heat The Adhesive Backing To Increase The Bonding Effect Before Installation)
- 【WIDELY USED】The Door Insulation Strip is a tough, long-lasting self-adhesive tape with minimal compression that helps prevent rattles, vibrations and squeaks. It is widely used as weather stripping, gaskets or cushioning and stabilizes major appliances such as doors, windows, furniture, electrical cabinets, speakers, toys, crafts, sports equipment, vents, air conditioning, plumbing, HVAC. Also, in cars, trucks and boats.

- SEAL AND KEEP OUT UNWANTED WIND, WATER, LIGHT AND SOUND! - The simple use of the draught excluder around a door or window frame can drastically help keep a comfortable temperature in your home. It's made of a flexible material and will not freeze or crack under extreme temperatures. Use together with other VITAM AMO Brand weatherization products to make your home more comfortable and energy efficient all year long. It seals large gap from 5/16’’ to 15/32’'.
- EVEN BETTER MATERIAL! The sealing strip is made of VITAM AMO's specially formulated EPDM rubber, which has excellent performance in low temperature environment, extrusion-resilience coefficient and durability. VITAM AMO weatherstripping can be used for both inside and outside application, for commercial or residential doors to help control your environment.
- A QUICK SOLUTION! NO TOOLS OR EXPERIENCE REQUIRED - The length of seal stripping is 18 feet. If the length of a roll is not enough for use, just purchase more rolls for extension. SUPER STRONG SELF-ADHESIVE door/window weather stripping is covered on one side with a strong sticky substance. Install it just by tearing the yellow film on the surface. It works on doors, windows, car trunks, hatches, electrical enclosures, coolers, lids and more.
- SPECIAL SOUNDPROOF HOLES DESIGN - Unlike other sealing strips, VITAM AMO sealing strip has a special design with multi holes. The multi holes always reduce the sound propagation on both sides of the door, and they absorb a portion of the sound waves to reduce the noise. Also, these holes can effectively reduce the pressing force between the door and the door frame while the door is being closed, thereby reducing the sound of closing the door.

- Strong Adhesive, Saves Money】Weather stripping door seal prevent heat and cold from escaping, save your heating and cooling bills. block noise, super adhesive, durable, not easy to degumming, easy to install
- 【5P High-Density Soft Hair】Brush weather stripping made of environmental friendly woven material, high density Brush, wear resistance, corrosion resistance, high-temperature resistance, excellent workmanship, soft bending without deformation
- 【Diverse Functions, Durable】The patio door weatherstripping has good anti-aging sealing performance,windproof, rainproof, dustproof, anti-collision, soundproof and energy saving
- 【Wide Application】Window insulation for winter Self adhesive seal strip widely used in various glass doors, aluminum doors windows, plastic steel windows, wooden doors, security doors, sliding doors, closets, cabinets and other gaps
- 【Easy to install】First measure the size of the gap between doors and windows, how much to use, how much to cut, energy saving, and environmental protection. If you have any questions, please contact us, and we will provide a perfect solution

- Upgraded Wedge Design: This window draft stopper features an upgraded wedge design, tapering from 5/32" to 11/32" (0.16"–0.35") to fit a wide variety of gap sizes. Ideal for use on various doors and windows
- Nylon Cloth&PU Foam: Window sound proofing seal outside the use of high tenacity nylon cloth, waterproof and scratch-resistant, doors and windows in the process of switching more silky smooth and not easy to be scratched.The internal by the high elasticity of the PU foam made of dense and delicate such as cream, randomly extruded and not deformed, not only to achieve good sealing effect will not affect the opening and closing of the doors and windows
- Widely Used: Wedge-shaped design of the door space filler can be used in a variety of places in life (sliding windows, casement windows, suspended windows, sliding doors, french doors, exterior doors, interior doors, front doors, cabinets, closets, bathroom cabinets, refrigerators, drawers, etc.), suitable for all kinds of material doors and windows (wood, glass, plastic, metal, etc.)
- Grid Adhesive Backing Design: The around door seal adopts a one-piece grid adhesive backing design, which is more adhesive than the general seal adhesive backing, and will not fall off easily during the use process, realizing long-lasting use
- Multi-Functional:Using our door jamb weather stripping can perfectly realize warmth in winter and coolness in summer, and save energy. At the same time there are sound insulation, anti-collision, shading, dustproof and other effects, make life more comfortable. Please note: When the weather is cold, it is recommended to use a hair dryer to heat the backing to enhance the adhesion

- KERF SLOT ONLY: This weather stripping door seal is designed only for door frames with pre-cut kerf slots orgrooves. No adhesive backing or glue required - just press the PVC flange into the groove.Please check your door frame before ordering
- BLOCK DRAFTS & NOISE: Flexible door weather stripping helps seal 1/4" -1/2" gaps to reduce drafts, wind, dust, light,and outdoor noise. Helps keep rooms more comfortable in winter and summer while reducing energy loss
- EASY DIY INSTALL: This door seal strip makes frame seal replacement simple. Remove the old seal, measure, cut tosize, and press it firmly into the kerf groove. No special tools needed
- 40FT MORE VALUE: 40ft exterior door weather stripping fits up to two standard exterior doors or multiple repairprojects. Great for replacing worn, cracked, loose, or aged door seals
- REFRESH OLD DOOR SEALS: A practical front door weather stripping solution for drafty entry doors, old house repairs, andpet-damaged seals. Helps restore a tighter door seal without replacing the whole door.
Understanding Different Types of Weatherstripping
The world of weatherstripping is more diverse than you might initially assume. Each type has its own strengths, weaknesses, and best applications. Choosing the right one for your old front door depends on the specific design of your door, the type of frame, and your budget.
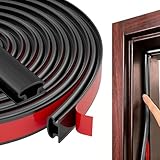
Vinyl or Rubber Strips
- Description: These are perhaps the most common and DIY-friendly types of weatherstripping. They are typically long, flexible strips made from vinyl or rubber and are affixed to the door frame or the door itself using adhesive backing or small nails. They come in various profiles to accommodate different gaps.
- Pros:
- Affordability: Generally the most budget-friendly option.
- Ease of Installation: Can often be installed by the average homeowner with basic tools.
- Flexibility: Adapts well to minor imperfections and irregular surfaces.
- Good for Moderate Gaps: Effective in sealing gaps up to about a quarter of an inch.
- Cons:
- Durability: Vinyl can become brittle and crack over time, especially with prolonged exposure to sunlight and extreme temperatures. Rubber is generally more durable but can still deteriorate.
- Adhesive Strength: The adhesive can sometimes fail, especially in areas with high traffic or temperature fluctuations.
- Appearance: While functional, some vinyl strips can look less aesthetically pleasing than other options.
Foam Strips
- Description: Similar to vinyl or rubber strips in terms of application, foam weatherstripping is made from compressible foam, often with an adhesive backing. It’s very pliable and can conform to irregular surfaces.
- Pros:
- Excellent Compression: Compresses easily to fill larger gaps effectively.
- Good Insulation: The foam material provides a decent level of insulation.
- Easy to Cut and Install: Can be easily trimmed to size and applied.
- Cons:
- Durability: Foam is generally less durable than rubber or vinyl and can degrade, tear, or compress permanently over time, losing its sealing effectiveness.
- Limited Lifespan: May need replacement more frequently than other types.
- Aesthetics: Can sometimes look less refined, especially if the foam is thick.
Felt Strips
- Description: These are typically narrow strips of wool or synthetic felt. They are often used in conjunction with other weatherstripping or for very small gaps where a softer seal is needed. They are usually stapled or nailed into place.
- Pros:
- Soft and Flexible: Conforms to uneven surfaces without causing damage.
- Good for Small Gaps: Effective for sealing very minor air leaks.
- Cons:
- Limited Sealing Power: Not suitable for larger gaps or areas requiring significant sealing pressure.
- Moisture Absorption: Felt can absorb moisture, which can lead to rot and mold if not properly managed.
- Durability: Can wear down over time, especially in high-traffic areas.
V-Strip (or Spring-Fin) Weatherstripping
- Description: This type of weatherstripping is made from a flexible material (often vinyl or aluminum) that is folded into a V-shape. When installed correctly, one or both “fins” of the V press against the door, creating a seal. It’s typically attached to the door frame at the sides and top of the door.
- Pros:
- Durable: Can be quite long-lasting, especially aluminum versions.
- Effective Seal: Creates a strong, consistent seal when the door is properly adjusted.
- Good for Tighter Gaps: Particularly good for doors that close with a firm pressure.
- Cons:
- Requires Precise Installation: Needs to be installed at the correct angle and tension to be effective.
- Less Forgiving of Warped Doors: If your door or frame is significantly warped, V-strips may not seal evenly.
- Can Be More Difficult to Install: Requires more care and precision than simple adhesive strips.
Metal or Rigid Strips with Vinyl Inserts
- Description: These are more robust solutions, often consisting of a metal channel (aluminum or steel) with a flexible vinyl or rubber insert. They are typically installed along the edges of the door frame.
- Pros:
- High Durability: The metal component makes them very resistant to wear and tear.
- Strong Seal: The combination of the rigid channel and flexible insert creates a very effective seal against drafts.
- Long Lifespan: Designed to last for many years.
- Cons:
- More Expensive: Generally a more significant investment than simpler options.
- Installation Can Be More Involved: May require some carpentry skills to install flush and effectively.
- Less Flexible for Warped Doors: Similar to V-strips, they work best on well-aligned doors.
Assessing Your Old Door’s Needs
Before you rush out to buy new weatherstripping, you need to take a critical look at your existing setup and the condition of your door and frame. This assessment will inform your purchasing decisions and ensure you choose the most effective solution.
Identifying Areas of Air Leakage
- The Draft Test: The simplest method is the draft test. On a windy day, or when your heating or cooling is on, hold your hand or a thin piece of paper along the edges of your closed door. You should be able to feel air moving through any significant gaps. Pay close attention to the top, bottom, and sides of the door.
- Visual Inspection: Take a good look at your current weatherstripping. Is it cracked, brittle, peeling, or missing in sections? Are there visible gaps between the weatherstripping and the door or frame? Check the bottom of the door for wear and tear, as this is often the area that experiences the most friction.
- The Light Test: Close your door in a darkened room with a bright light source (like a flashlight or even the sun) shining from the outside. If you can see light peeking through the edges, you have air leaks. The more light you see, the larger the gap.
Evaluating Your Door and Frame Condition
- Door Warping: Has your door begun to warp? This is common with solid wood doors, especially in humid environments. A warped door will not sit flush against the frame, creating gaps that even the best weatherstripping may struggle to seal completely. You might need to address the door itself before or in conjunction with the weatherstripping.
- Frame Integrity: Is your door frame sound? Are there any cracks, rot, or loose sections? Damage to the frame can prevent weatherstripping from making proper contact and can also be an entry point for drafts.
- Door Sagging: Does your door sag on one side when closed? This often indicates issues with the hinges. A sagging door will leave a larger gap on one side, requiring a more robust weatherstripping solution or hinge adjustment.
Installing New Weatherstripping for Maximum Effectiveness
The best weatherstripping in the world is useless if it’s not installed correctly. Proper installation ensures a tight seal and maximizes the longevity and effectiveness of your chosen product.
Preparing the Surface
- Remove Old Weatherstripping: Carefully remove any old, worn-out weatherstripping. For adhesive types, use a putty knife or scraper to gently lift the material. For stapled or nailed types, identify and remove all fasteners.
- Clean the Area: This is a critical step often overlooked. Thoroughly clean the surfaces where the new weatherstripping will be applied. Use a mild detergent and water, followed by a clean cloth to dry. For adhesive types, you may want to use a degreaser or rubbing alcohol to ensure the surface is completely free of dirt, oil, and any residue from old adhesive. A clean surface is essential for the new adhesive to bond properly.
Application Techniques for Different Types
- Adhesive Strips (Vinyl, Rubber, Foam):
- Measure and Cut: Measure the length needed for each side and the top of the door frame. Cut the weatherstripping with sharp scissors or a utility knife.
- Apply Gradually: Peel back only a few inches of the adhesive backing at a time. Align the weatherstripping precisely along the edge of the frame. Press firmly as you move along, ensuring good contact. Avoid stretching the material.
- Corners: For corners, you can either cut the strip at a 45-degree angle (mitered cut) or carefully fold the material to create a continuous seal.
- Test the Seal: Once installed, close the door and check for proper contact. You may need to adjust the position slightly.
- V-Strip / Spring-Fin Weatherstripping:
- Measure and Cut: Measure the height of the door frame. Cut the V-strip to length.
- Positioning: The V-strip is usually mounted on the door jamb so that the fins press against the edge of the door when it is closed. The angle of the V is important – it needs to be positioned so that it compresses slightly when the door is shut, creating tension.
- Nailing/Screwing: Secure the V-strip in place using small nails or screws, ensuring it lies flat and runs the full height of the jamb. Start at the top and work your way down.
- Door Adjustment: You may need to adjust your door’s hinges to ensure it closes with sufficient pressure against the V-strips for an effective seal.
- Bottom Door Sweeps and Thresholds:
- Door Sweeps: These are attached to the bottom of the door. They usually have a metal or plastic retainer that holds a vinyl or brush seal. Measure the width of the door and cut the sweep to size. Screw it onto the door, ensuring the sweep makes contact with the threshold without dragging excessively.
- Thresholds: If your existing threshold is damaged or worn, consider replacing it with a new one that has a built-in sealing element. These often have a vinyl or rubber insert that contacts the bottom of the door. Installation typically involves removing the old threshold and securing the new one to the subfloor. Proper alignment with the door sweep is crucial.
When considering the best weatherstripping for an old front door, it’s essential to also think about the overall maintenance of your home’s exterior. An informative article that discusses the differences between soft washing and pressure washing can provide valuable insights into how to keep your home looking its best while ensuring that your weatherstripping remains effective. For more details, you can check out this article on soft wash vs pressure wash, which highlights the best options for maintaining your home’s exterior.
Choosing the “Best” for Your Old Door – It’s About the Right Fit
The term “best” weatherstripping isn’t a one-size-fits-all declaration. It’s about understanding what constitutes the “best” for your specific old front door. This means considering a combination of factors beyond just brand name or material.
Material Considerations
- Rubber vs. Vinyl: High-quality EPDM (ethylene propylene diene monomer) rubber is generally more durable and resistant to UV rays and temperature extremes than most vinyl. However, some premium vinyl formulations can also be quite resilient. For areas with intense sunlight and fluctuating temperatures, rubber might be a superior choice.
- Urethane Foam: High-density urethane foam can offer a good balance of compressibility and durability for moderate gaps. It’s often a good compromise between the ease of installation of basic foam and the longevity of rubber.
- Aluminum and Vinyl Combinations: For the most robust and long-lasting solution, consider metal (usually aluminum) channels with a high-quality vinyl insert. These are often found in higher-end V-strips or dedicated door jamb weatherstripping kits. They offer excellent durability and a strong seal.
Durability and Longevity
- Look for UV Resistance: If your door receives a lot of direct sunlight, choose weatherstripping that is specifically labeled as UV-resistant. This will prevent premature cracking and degradation.
- Consider Temperature Fluctuations: Materials that remain flexible across a wide range of temperatures will perform better. Some cheaper materials can become brittle in the cold and sticky or soften in the heat, reducing their effectiveness.
- Warranty Information: While not always a guarantee, a longer warranty period from a reputable manufacturer can indicate confidence in the product’s durability.
Ease of Installation vs. Performance
- DIY Friendly: If you’re a novice at home improvement, prioritize adhesive-backed vinyl, rubber, or foam strips. These are designed for straightforward installation without specialized tools.
- For the Dedicated Homeowner: If you’re comfortable with basic carpentry and precision, V-strips and metal-vinyl combination systems can offer superior long-term performance and a more professional finish. You might need to adjust hinges or even shave a small amount off the door edge for optimal fit with these more rigid systems.
- Professional Installation: If you have significant door issues (warping, sagging) or are looking for the absolute best possible seal and are less inclined to do the work yourself, consider hiring a professional. They can assess the door’s condition, recommend the best materials, and ensure a perfect installation.
By thoughtfully considering these aspects, you can move beyond simply replacing old weatherstripping and make a strategic upgrade that will serve your home well for years to come. It’s not about finding a magic bullet, but about making an informed choice that addresses the specific challenges of your old front door.
Leave a Reply