You’ve likely experienced the frustration. You’re halfway through cleaning your deck, washing your car, or tackling that stubbornly grimy patio, and the powerful stream from your electric pressure washer dwindles to a disappointing dribble. The satisfying roar has turned into a whimpering hum, and your once mighty cleaning tool has become a mere puddle-maker. You’re facing electric pressure washer pressure loss, and it’s a common, yet often easily solvable, problem. Don’t pack it up just yet. With a methodical approach, you can diagnose and fix the issue, restoring your pressure washer to its former glory.
This guide will walk you through common causes of pressure loss and how you can address them. We’ll start with the basics and move towards more intricate issues, empowering you with the knowledge to become your own pressure washer technician. Remember, safety first! Always disconnect the power source and release any residual pressure before diving into any troubleshooting.
Your pressure washer needs a steady, robust supply of water to operate at its peak. If the water flow to your machine is restricted, the outcome at the nozzle will be equally compromised. Think of it like trying to drink a thick milkshake through a tiny straw – the pressure simply won’t be there. This is often the most overlooked aspect of pressure washer maintenance, yet it can be the culprit behind significant pressure loss. You might be surprised at how often a simple check of your water supply can resolve your woes.
Is Your Garden Hose Kinked or Obstructed?
This might seem incredibly basic, but it’s astonishing how often a simple kink in your garden hose can drastically reduce water flow. A sharp bend in the hose can effectively pinch off the water supply, acting like a valve that’s only partially open.
Investigating for Kinks
- Visually Inspect the Entire Length: Slowly and carefully walk the length of your garden hose, from the spigot all the way to the pressure washer inlet. Look for any tight bends or areas where the hose is folded over itself.
- Straighten and Untwist: If you find any kinks, gently straighten them out. Sometimes, simply untwisting the hose can alleviate the issue.
- Ensure It’s Lying Flat: Make sure the hose isn’t being crushed by any objects or twisted in a way that obstructs the internal diameter.
Clearing Internal Obstructions
Sometimes, debris can get lodged inside the garden hose, particularly if it’s an older hose or has been stored poorly.
- Disconnect and Flush: Disconnect the hose from both the spigot and the pressure washer. Hold one end open to the sky and the other towards the ground, allowing gravity to help dislodge any loose debris.
- Run Water Through: Reconnect the hose to the spigot and turn on the water at a low pressure. Let it run through the hose for a minute or two to flush out any remaining particles.
- Consider a Replacement: If you suspect significant internal damage or persistent blockages, it might be time to invest in a new, high-quality garden hose specifically designed for pressure washer use. Look for hoses that are less prone to kinking and are rated for higher water flow.

- Delivers 2500 max PSI and 1.76 max GPM (at lowest pressure), and 2000 rated PSI and 1.2 rated GPM of water flow; Pro-style steel extendable 17.5” wand with quick-connect nozzles (0°, 15°, 25°, turbo and soap applicator)
- Super compact and lightweight at 16.5” tall and 19 pounds for convenient storage and portability; Four quick-lock wheels with 360° steering design and low center of gravity engineered for anti-tipping design
- Easy-coil nylon braided 25' hose; 20 ounce onboard soap tank to add detergents/chemicals for heavy duty cleaning power on decks, driveways, garage floors, stairs, fencing, patio furniture and vehicles
- Pump automatically stops when trigger is not engaged to conserve energy and promote pump and motor life
- Backed by a 3-Year limited service, labor and parts coverage with nationwide customer service and support network


- HIGH PRESSURE WASHER: LWQ power washer with deep cleaning high pressure up to 2.5 GPM of water flow. It's saving water and energy, it also ensures high cleaning efficiency and the ability to clean objects with complex shapes and structures, which makes it ideal for cleaning various surfaces in your home, such as driveways, patio furniture, and cars.
- MULTI-PURPOSE USE: Equipped with 4 quick-connect metal spray nozzles (water-pressure strength:0°>15°> 25°> 40°) and a foam cannon, the LWQ pressure washer is easy to clean objects with complex shapes and structures. The detergent bottle can be filled with chemicals such as bleach, the cleaner will not pass through the pump.
- CONVENIENT TO USE: LWQ Pressure Washer designs of 2 rollers for easy movement and operation, while the bottom of the body adds an anti-tipping design for overall stability when not in motion. Simple assembly + dual-roller design + anti-tipping base + faucet/bucket water collection system - making it more convenient to use anywhere.
- EASY TO STORAGE: With power cord hook and nozzle holders, it is easy to access or to store in a garage/pantry after use. In addition, its compact design for easy to store in a garage or pantry when not in use. The LWQ pressure washer is perfect for cleaning concrete, pavement, driveways, patios, decks, sidewalks, RVs, cars, boats, homes, fencing, and more.
- USER-FRIENDLY & SAFETY: The LWQ pressure washer using high-pressure water flow to clean up the dirt, for saving water and energy and ensuring high cleaning efficiency. Tip: Before turning on the pressure washer, exhaust the air in the high pressure hose as well as the inlet hose, this will ensure that the machine can spray high pressure water stream properly.
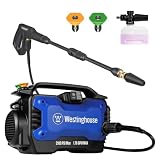
- BIG POWER. SMALL DESIGN: Delivers an impressive 2100 max PSI and 1.76 max GPM at lowest pressure, with 1800 rated PSI and 1.2 rated GPM so you're able to handle a range of tough jobs
- GRAB-AND-GO CLEANING: The ultra compact 10 pound electric pressure washer is easy to use, carry and store for everyday outdoor cleanups, wherever and whenever you find them
- ORGANIZED FOR EASY SETUP AND STORAGE: Built-in holders keep the spray gun, lance and standard spray nozzles together between jobs so it's always ready to grab and go
- SUPER SOAPER: The adjustable foam cannon lets you apply thick, clinging foam to loosen grease, grime and stains from cars, windows, decks and more
- GO GET THE GRIME: Enjoy extended reach with a 35 foot GFCI power cord and 20 foot high-pressure hose so you can walk and wash all around vehicles and outdoor spaces

- Delivers 3000 max PSI and 1.76 max GPM (at lowest pressure), and 2600 rated PSI and 1.1 rated GPM of water flow. Perfect for decks, sidewalks, fences, garage floors, exterior walls, cars and patio furniture; Comes with a .45 gallon soap tank
- 25′ abrasion resistant super-flex hose with lightweight high pressure metal spray gun and wand with 5 quick connect nozzles (0°, 15°, 25°, soap and turbo); Compatible with pressure washer accessories like surface cleaners, undercarriage cleaners and foam cannons with M22 fittings
- Heavy duty AC 120V electric motor and long-lasting, maintenance-free axial 3 piston auto-stop pump provides up to 1.76 gallons of water (and soap) a minute
- Rugged steel frame with high profile 10” never-flat wheels and 35’ GFCI cord provide easy transportation and maneuverability; Includes tools and quick start guide to get cleaning in minutes
- All Westinghouse pressure washers are functionally tested in the factory and are backed by 3-year limited manufacturer service, labor and parts coverage

- TRUBRUSHLESS MOTOR : Powerful 14 Amp TruBrushless motor generates 3000 PSI and 2.0 GPM for maximum cleaning power.Cleaning Units 3300 C.U. Maximum Inlet Water Temperature 104°F (40°C).
- All water pressure (PSI) and flow rate (GPM) claims for this product were tested and verified by an independent lab, ensuring you’ll take home the power you were promised
- JETTFLOW TECHNOLOGY : Delivers up to 50% more flow, reaching higher areas and quick power rinsing
- ACCESSORIES : Equipped with rugged metal gun and hassle-free 25-FT Uberflex kink-resistant hose; 15°, 25° and 40° tips, soap and turbo nozzles included

- POWERFUL CLEANING PERFORMANCE: Powered by a 1600W motor, this electric pressure washer delivers up to 2465 PSI max pressure and 1.76 max flow rated to break through dirt, grime, and buildup with less cleaning time and effort
- VERSATILE CLEANING NOZZLES: Includes 4 quick-connect spray tips: 0°, 15°, 25°, and 40°, plus a 0.4L detergent bottle for added cleaning power. Ideal for washing vehicles, fences, gates, driveways, and concrete patios with eco-friendly soap that helps reduce filter clogging and supports longer machine life
- EXTENDED REACH DESIGN: The 20 ft high-pressure hose and 35 ft power cord give you plenty of reach around your cleaning area without constantly repositioning the unit. Two smooth-rolling wheels make it easy to move the washer while maintaining steady balance
- AUTOMATIC SHUTOFF SAFETY: The automatic On/Off function stops the motor when the spray trigger is released, helping reduce unnecessary operation. An integrated trigger safety lock also helps prevent unintended spraying during storage or when the washer is not in use
- CONVENIENT ACCESSORY STORAGE: Keep essential accessories close at hand with the built-in power cord hook and convenient accessory holder for storing the hose, spray nozzles, and cord. The compact design fits easily into a garage, utility area, or pantry when cleaning is finished

- Delivers 3400 max PSI and 2 max GPM (at lowest pressure), and 3000 rated PSI and 1.1 rated GPM of water flow; Perfect for decks, sidewalks, siding, fences, railings, garage floors, exterior walls, cars and patio furniture; Comes with a half gallon onboard soap tank
- 25′ abrasion resistant super-flex hose with lightweight high pressure metal spray gun and wand with 5 quick connect nozzles (0°, 15°, 25°, soap and turbo) - compatible with pressure washer accessories such as surface cleaners, undercarriage cleaners and foam cannons with M22 fittings
- Heavy duty AC 120V true brushless electric engine - long-lasting, maintenance-free axial 3 piston auto-stop pump provides up to 2 gallons of water (and soap) a minute
- Rugged steel frame with high profile 10” never flat wheels and 35’ GFCI cord provide easy transportation and maneuverability – includes tools and quick start guide to get cleaning in minutes
- All Westinghouse pressure washers are functionally tested in the factory and are backed by 3-year limited manufacturer service, labor and parts coverage

- Delivers 2100 max PSI and 1.76 max GPM (at lowest pressure), and 1800 rated PSI and 1.2 rated GPM of water flow.
- Super compact and lightweight at 18 pounds for convenient storage and portability; Built-in handle for easy transportation to wherever your cleaning tasks are
- Easy-coil nylon braided 20’ hose; Detachable foam cannon to add detergents or chemicals for heavy duty cleaning power on decks, driveways, garage floors, stairs, fencing, patio furniture and vehicles
- Pump automatically stops when trigger is not engaged to conserve energy and promote pump and motor life
- Backed by 3-year limited service, labor and parts coverage with nationwide customer service and support network

- Delivers 2300 max PSI and 1.76 max GPM (at lowest pressure), and 1900 rated PSI and 1.24 rated GPM of water flow; Pro-style steel extendable 17.5” wand with quick-connect nozzles (0°, 15°, 25°, turbo and soap applicator)
- Super compact and lightweight at 16.5” tall and 19 pounds for convenient storage and portability; Four quick-lock wheels with 360° steering design and low center of gravity engineered for anti-tipping design
- Easy-coil nylon braided 25' hose; 20 ounce onboard soap tank to add detergents/chemicals for heavy duty cleaning power on decks, driveways, garage floors, stairs, fencing, patio furniture and vehicles
- Pump automatically stops when trigger is not engaged to conserve energy and promote pump and motor life
- Backed by a 3-year limited service, labor and parts coverage with nationwide customer service and support network

- TRUBRUSHLESS MOTOR : Powerful 14 Amp TruBrushless motor generates 3000 PSI and 2.0 GPM for maximum cleaning power.Cleaning Units 3300 C.U. Maximum Inlet Water Temperature 104°F (40°C).Frequency : 60 hz
- PWMA CERTIFIED (Pressure Washer Manufacturers‘ Association) : All water pressure (PSI) and flow rate (GPM) claims for this product were tested and verified by an independent lab, ensuring you’ll take home the power you were promised
- BETTER THAN GAS PERFORMANCE : Heavy duty cast aluminum axial cam pump provides better than gas performance
- JETTFLOW TECHNOLOGY : Delivers up to 50% more flow, reaching higher areas and quick power rinsing
- RUGGED DESIGN + ACCESSORIES : Equipped with rugged metal gun and hassle-free 25-FT Uberflex kink-resistant hose; 15°, 25° and 40° tips, plus soap and turbo nozzles included
Is the Water Pressure from Your Spigot Sufficient?
Your pressure washer is designed to amplify the water pressure it receives. However, if the initial pressure from your home’s water supply is too low, even the most efficient pressure washer will struggle to deliver the advertised PSI.
Understanding Minimum Inlet Pressure Requirements
Most electric pressure washers have a minimum inlet pressure requirement specified in their user manuals. This is crucial information.
- Consult Your Manual: Dig out your pressure washer’s user manual. It will likely state the minimum PSI required at the inlet.
- Measure Your Home’s Pressure: You can purchase an inexpensive water pressure gauge that screws directly onto your spigot. Turn on the water fully and note the reading. This will tell you your home’s static water pressure.
- Compare and Assess: If your home’s pressure is consistently below the manufacturer’s specified minimum, your pressure washer will inherently have reduced performance.
What to Do if Inlet Pressure is Too Low
If you’ve confirmed your home’s water pressure is insufficient, you have a few options.
- Use a Shorter, Wider Garden Hose: A shorter hose experiences less friction loss. A wider diameter hose also allows for greater water flow.
- Ensure No Other High-Demand Fixtures Are Running: If someone is using a significant amount of water elsewhere in your house (e.g., running a washing machine, taking a long shower), it can reduce the pressure available at your outdoor spigot. Try to ensure minimal water usage elsewhere while you’re using the pressure washer.
- Consider a Booster Pump (Advanced): For persistent low-pressure issues, a dedicated water booster pump could be installed on your incoming water line. This is a more significant installation and might require professional plumbing help.
- Accept Limitations: In some cases, if your home’s plumbing simply can’t deliver adequate pressure, you may need to accept that your pressure washer won’t reach its maximum potential.
Is the Inlet Filter Clogged?
Virtually all electric pressure washers have a small mesh filter at the water inlet to prevent debris from entering the pump. If this filter becomes clogged with sediment, sand, or mineral deposits, it will severely restrict water flow to the pump.
Locating and Accessing the Inlet Filter
The location of the inlet filter can vary slightly between models.
- Check Your Manual: The user manual is your best friend here. It will show you precisely where the inlet filter is located on your specific model.
- Typically at the Hose Connection: Usually, you’ll find the filter where your garden hose connects to the pressure washer. Sometimes it’s a separate cap you unscrew, and other times it’s nestled within the inlet fitting itself.
Cleaning the Inlet Filter
This is a relatively simple task that can yield significant results.
- Disconnect and Drain: Ensure your pressure washer is unplugged and any residual pressure has been released. Disconnect the garden hose from the inlet.
- Remove the Filter: Carefully unscrew or otherwise remove the inlet filter. You might need pliers, but be gentle to avoid damaging the plastic housing.
- Rinse Thoroughly: Take the filter to a sink or outdoor faucet and rinse it under running water. Use a soft brush (an old toothbrush works well) to gently scrub away any stubborn debris. You can also soak it in a diluted vinegar solution for stubborn mineral deposits.
- Inspect for Damage: While you have the filter out, inspect it for any tears or holes. A damaged filter won’t effectively protect your pump and will need to be replaced.
- Reinstall Securely: Once clean and dry, carefully reinsert the filter and ensure the cap or fitting is securely tightened. Reconnect your garden hose.
If you’re experiencing issues with your electric pressure washer losing pressure after a few minutes of use, it might be helpful to explore related articles that discuss equipment maintenance and gardening tools. For instance, you can check out this article on the best wheelbarrows for your gardening needs, which provides insights into essential gardening equipment that can complement your pressure washer. You can read more about it here: The Top 10 Best Wheelbarrows for Your Gardening Needs.
Examining the Garden Hose and Fittings: The Crucial Link
Beyond kinks and blockages, the connection points between your garden hose, your spigot, and your pressure washer are vital for maintaining optimal water flow. Any leaks or loose fittings at these junctures will bleed off precious water pressure before it even reaches the pump.
Are Connections Loose or Leaking?
Every little drip counts when it comes to water pressure. A seemingly minor leak at a connection can translate to a noticeable drop in the force of your spray.
Identifying Loose Fittings
- Feel for Air/Water Escaping: With the water turned on (at a low setting initially if you’re concerned about a mess), run your hand around each connection point. You should feel for a steady stream of water or hear a hissing sound indicating escaping air or water.
- Visual Inspection: Look closely for visible signs of water seeping out from around the threads or seals of the fittings.
Tightening Connections
- Hand-Tighten First: Always start by hand-tightening all connections. Most water fittings are designed to be sealed by hand.
- Gentle Use of Pliers/Wrench (If Necessary): If a connection still seems loose or is leaking after hand-tightening, you can use pliers or a wrench to give it a very gentle extra turn. Be extremely careful not to overtighten. Overtightening can strip threads or crack plastic fittings, creating a worse problem.
- Check Washers/Seals: Many hose connections have rubber washers or O-rings to create a seal. Ensure these are present, properly seated, and not cracked or degraded. If they look worn, replace them.
Is the Garden Hose Damaged Internally or Externally?
While we touched on internal obstructions, the hose itself can also be a source of pressure loss if it’s damaged.
Inspecting for Cracks, Punctures, or Delamination
- Outer Shell: Look for any visible cracks, cuts, or punctures in the outer rubber or plastic layer of the hose. These can lead to leaks and reduced water flow.
- Bulges or Swelling: If you notice any areas where the hose is bulging or swollen, it indicates internal damage, possibly to reinforcing layers. This weakens the hose and can lead to a rupture.
- Delamination: For older hoses, the inner and outer layers can start to separate (delaminate). This can create internal blockages and restrict flow.
When to Replace Your Garden Hose
- Significant Damage: Any hose with visible cracks, deep cuts, or significant bulges should be replaced immediately.
- Persistent Kinking: If your hose seems to kink excessively even after being straightened, it might be a sign of internal damage or a manufacturing defect.
- Degraded Material: If the hose material feels brittle, cracked, or is showing signs of significant wear and tear, it’s a good indicator it’s time for a replacement.
- Inadequate Flow Rate: Even if the hose looks okay, if you’ve tried all other troubleshooting steps and still have low pressure, consider that your current garden hose might not be rated for the flow rate your pressure washer requires. Invest in a higher-quality, wider-diameter hose.
Investigating the High-Pressure Hose and its Connections

The high-pressure hose is where the water is truly pressurized and sent to your cleaning lance. Any issues here will directly impact the pressure you experience at the nozzle. This is a component that experiences significant stress and is prone to wear and tear.
Are There Any Leaks on the High-Pressure Hose?
Leaks on the high-pressure hose are a major cause of pressure loss and can also be a safety hazard.
Identifying Leaks on the High-Pressure Hose
- Listen for Hissing: With the pressure washer running and the trigger squeezed, listen carefully for any hissing sounds along the length of the high-pressure hose and at its connection points.
- Look for Spray or Drips: Carefully inspect the entire length of the hose. You might see fine sprays of water or noticeable drips coming from damaged sections.
- Check Connection Points: Pay close attention to where the high-pressure hose connects to the pressure washer’s outlet and to the spray gun. These are common areas for leaks.
Addressing Leaks on the High-Pressure Hose
- Minor Leaks at Connections: If the leak is at a threaded connection, try gently tightening it. Ensure the O-rings or seals are in good condition. If they are worn or damaged, they will need to be replaced.
- Hose Damage (Cuts, Abrasions, Blisters): If the high-pressure hose itself has visible damage like cuts, deep abrasions, or blistering, it must be replaced immediately. A damaged high-pressure hose is a serious safety risk and can rupture under pressure, causing injury. Do not attempt to patch a high-pressure hose.
- Burst/Ruptured Hose: If the hose has burst, it’s a clear indication that it needs to be replaced.
Are the High-Pressure Hose Fittings Secure?
The fittings that connect the high-pressure hose to the machine and the spray gun are critical. If they are loose or damaged, they will compromise the pressurized water flow.
Checking the Security of Fittings
- Visual Inspection: Ensure the fittings are screwed in tightly and appear to be in good condition. Look for any signs of cracking or damage to the plastic or metal components.
- Gentle Tightening: With the machine off and depressurized, you can try gently re-tightening the fittings. Again, do not overtighten, as this can damage the threads or the fittings themselves.
Signs of Damaged Fittings
- Cracked Plastic: Cracks in plastic fittings are a clear sign of weakness and potential leaks.
- Stripped Threads: If a fitting spins freely or doesn’t seem to engage properly, the threads may be stripped.
- Corrosion (on metal fittings): While less common on electric models, excessive corrosion on metal fittings can weaken them and lead to leaks.
Examining the Spray Gun, Lance, and Nozzle: The Business End

The final components that the water encounters before it exits as a cleaning stream are the spray gun, lance, and nozzle. Issues at this stage directly impact the perceived pressure and effectiveness of your cleaning.
Is the Trigger on the Spray Gun Stuck or Not Fully Engaging?
Many pressure washers have a safety mechanism that prevents them from running dry or at full pressure if the trigger isn’t fully engaged.
Testing Trigger Engagement
- Feel the Resistance: When you squeeze the trigger, you should feel a definite click or resistance when it’s fully engaged.
- Listen for Pump Engagement: On some models, you might hear the pump engage more strongly when the trigger is fully pressed.
- Observe for Immediate Spray: When you fully squeeze the trigger, you should get an immediate and strong spray of water. If it’s weak or delayed, there might be an issue with the trigger mechanism or its connection to the pump.
Common Trigger Issues and Solutions
- Debris in the Trigger Assembly: Small stones, dirt, or grime can get lodged in the trigger mechanism, preventing it from fully engaging. Try gently cleaning around the trigger area with a soft brush.
- Worn O-rings: The O-rings within the spray gun can wear out over time, leading to internal leaks and reduced pressure. This might require replacement of specific O-rings.
- Internal Valve Problems: The trigger assembly contains a valve that controls water flow. If this valve is damaged or not functioning correctly, it will affect pressure. This might necessitate repair or replacement of the spray gun.
Is the Nozzle Clogged or Incorrectly Attached?
The nozzle is where the water is accelerated to create the high-pressure stream. A clogged or improperly attached nozzle will drastically reduce performance.
Checking for Nozzle Blockages
- Visual Inspection: Remove the nozzle from the lance and look into the opening. You should see a clear passage.
- Use a Thin Pin or Needle: If you see debris, use a thin, pointed object like a sewing needle, paperclip, or the small tool often provided with your pressure washer to gently poke through the nozzle opening and dislodge any blockages. Be careful not to enlarge the hole.
- Flush with Water: Flush the nozzle with water from a tap to ensure any loose debris is removed.
Ensuring Correct Nozzle Attachment
- Quik-Connect Issues: Most electric pressure washers use a quick-connect system for nozzles. Ensure the nozzle is fully inserted into the lance and that the collar clicks into place, securing it.
- Twist-On Nozzles: Some older or simpler models might have twist-on nozzles. Ensure it’s screwed on securely but not overtightened.
- Using the Right Nozzle: Remember that different nozzles (e.g., 0-degree, 15-degree, 25-degree, 40-degree, soap nozzle) have different spray patterns and flow rates. Using the wrong nozzle for the task, or an incorrect one for your pressure washer, can affect pressure. Refer to your manual for recommended nozzles.
Are There Internal Leaks within the Spray Gun or Lance Assembly?
The intricate parts within the spray gun and lance can wear down over time, leading to internal leaks that bleed off pressure.
Identifying Internal Leaks
- Observe Water Bypass: With the machine running and the trigger squeezed, if you see water leaking from areas that aren’t the nozzle or the intended spray path, it suggests an internal leak. This could be from seals within the spray gun handle or where the lance connects to the gun.
- Deterioration of O-rings/Seals: The internal O-rings and seals within the spray gun and lance are crucial for maintaining pressure. If these are worn, cracked, or degraded, you’ll experience pressure loss.
Dealing with Internal Leaks
- Check and Replace O-rings: For many pressure washer brands, replacement O-ring kits are available. These are often relatively inexpensive and can be swapped out to fix minor internal leaks. Consult your manual for the correct O-ring sizes and locations.
- Disassembly and Cleaning: In some cases, you might need to carefully disassemble parts of the spray gun or lance to clean out debris or inspect seals. Proceed with caution and ensure you understand how the components fit together.
- Replacement of Components: If the internal components are significantly damaged or worn beyond repair, you may need to replace the entire spray gun or lance assembly.
If you’re experiencing issues with your electric pressure washer losing pressure after a few minutes of use, you might find it helpful to explore some troubleshooting tips. Understanding the common causes of pressure loss can significantly improve your cleaning experience. For more insights on how to effectively use your pressure washer for various tasks, check out this informative article on the best pressure washers available, which covers everything from driveways to bikes.
The Pump: The Heart of Your Pressure Washer
| Issue | Possible Causes | Solutions |
|---|---|---|
| Electric Pressure Washer Loses Pressure | Clogged nozzle, air leakage, pump issues | Check and clean the nozzle, inspect for air leaks, check and repair pump if necessary |
| Pressure Loss After Few Minutes | Overheating, water inlet issues, worn seals | Allow the washer to cool down, check water inlet for blockages, replace worn seals |
The pump is the engine of your pressure washer, responsible for building and maintaining the high pressure. If the pump is experiencing issues, it will be the most significant contributor to pressure loss.
Has the Pump Run Dry?
Running a pressure washer without water can quickly damage the pump’s seals and internal components, leading to permanent pressure loss.
Signs of Running Dry
- Unusual Noises: A dry pump can make grinding, squealing, or rattling noises.
- Overheating: The pump will overheat rapidly when not lubricated by water. You might smell a burning odor.
- Sudden or Gradual Pressure Loss: The damage caused by running dry often manifests as a significant drop in pressure.
What to Do If You Suspect You Ran the Pump Dry
- Immediately Turn Off: Disconnect the power and stop the machine at the first sign of trouble.
- Allow to Cool: Let the pump cool down completely.
- Check for Leaks: Look for any visible signs of damage or leaks from the pump housing.
- Follow Restart Procedures: Consult your manual for specific instructions on restarting a pressure washer after it may have run dry. This might involve carefully filling the pump with water.
- Professional Inspection: If you suspect significant damage, it’s advisable to have the pump inspected by a qualified technician.
Are the Pump Seals Worn or Damaged?
The seals within the pump are critical for preventing water from escaping and air from entering. Worn or damaged seals are a common cause of pressure loss.
Identifying Worn Pump Seals
- Visible Leaks: The most obvious sign is water leaking directly from the pump housing, particularly from the shaft seal where the motor connects to the pump.
- Air Bubbles in the Water Inlet: If air is being drawn into the pump through worn seals, you might see air bubbles in the water at the inlet.
- Low Pressure: Even without visible leaks, worn seals can lead to internal pressure loss.
Replacing Pump Seals
- Requires Disassembly: Replacing pump seals typically involves disassembling the pump unit. This is a more complex repair.
- Consult Your Manual or Service Guide: Your user manual or a specific service guide for your model will provide instructions on how to access and replace pump seals.
- Consider Professional Service: If you are not comfortable with mechanical repairs or do not have the necessary tools, it is highly recommended to take your pressure washer to a professional repair shop. Damaged pumps can be expensive to replace.
Has the Pump Oil Level Dropped (for oil-lubricated pumps)?
Some electric pressure washers have a pump that requires oil lubrication. A low oil level can lead to overheating and damage, ultimately causing pressure loss.
Checking the Oil Level
- Locate the Oil Reservoir: Refer to your manual to find the oil reservoir for the pump.
- Use the Dipstick or Sight Glass: Most pumps will have a dipstick or a sight glass to indicate the oil level.
- Add Oil if Necessary: If the oil level is low, add the type and amount of oil recommended in your user manual.
When to Seek Professional Help for Pump Issues
- Constant Leaking: If you have persistent leaks from the pump that you cannot resolve by replacing seals.
- Grinding or Unusual Noises: Persistent and concerning noises from the pump that don’t go away.
- Complete Failure: If the pump is no longer producing any pressure.
- Lack of Mechanical Skill: If you are uncomfortable with the disassembly and reassembly required for pump repairs.
By systematically working through these troubleshooting steps, you can often pinpoint the cause of your electric pressure washer’s pressure loss. Remember to always prioritize safety, consult your owner’s manual, and don’t hesitate to seek professional help if a repair seems beyond your comfort level or skill set. With a little patience and detective work, you can get your pressure washer back to delivering that satisfyingly powerful spray.
Leave a Reply