
You’ve noticed an unwelcome orange-red stain marring the surface of your concrete driveway, patio, or walkway. This isn’t just common dirt; it’s red clay, a persistent adversary to clean concrete. Whether it’s from runoff after a heavy rain, spilled soil from gardening, or residue tracked in from a construction site, red clay has a notorious reputation for clinging tenaciously to porous surfaces. Its microscopic particles, rich in iron oxides, embed themselves deep into the concrete’s matrix, making simple rinsing ineffective.
Understanding the Challenge of Red Clay Stains
Before you tackle the stain, you need to understand why red clay is so difficult to remove. This knowledge will inform your cleaning strategy and prevent you from wasting time on ineffective methods.
The Composition of Red Clay
Red clay is characterized by its high iron content. These iron oxides are responsible for its distinctive reddish-brown color. When wet, clay particles become suspended and can penetrate even the smallest pores in concrete. As the water evaporates, these minuscule particles dry and effectively “cement” themselves to the concrete’s surface, leaving a stubborn discoloration.
If you’re looking for effective methods to remove red clay stains from concrete, you might find it helpful to explore additional resources that address related cleaning challenges. One such article discusses how to fix issues with your electric pressure washer pump, which can be an essential tool in tackling tough stains like red clay. To learn more about maintaining your pressure washer for optimal performance, check out this informative piece on how to fix your electric pressure washer pump.
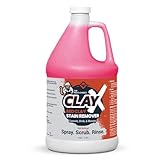
- Red Clay and Rust Stain Remover for Concrete and Masonry Dissolves stubborn red clay, red dirt, and iron oxide stains from driveways, walkways, patios, foundation walls, and retaining walls. Works on concrete, brick, pavers, stucco, and both natural and artificial stone.
- Professional Strength – Homeowner Safe Buffered acid formula delivers contractor-grade results with lower fumes and reduced risk of burning and surface damage when used as directed.
- Fast-Acting Formula for Concrete and Masonry Surfaces Targets embedded red clay and rust stains on contact. Ideal for clay-heavy soils in the Southeastern U.S. and similar regions.
- Ideal for Driveways, Sidewalks, Retaining Walls, and More Restores original appearance to deeply stained surfaces like garage floors, porches, vertical foundations, and brick facades.
- Works Where Pressure Washing Alone Fails Breaks the chemical bond between iron oxide and masonry pores. Penetrates deeper than water or bleach-based cleaners.

- Goodbye Rust: Remove rust stains outside the home with a long-standing heavy-duty rust removal. The unique cleaner works quickly to dissolve rust stains on contact for outdoor applications.
- Super Strength: The heavy-duty stain remover is specifically formulated to easily rinse away the toughest rust stains, eliminating the need for scrubbing or power washing. This product is vegetation-friendly when used as directed.
- Multi-Purpose: Rust-colored stains occur outdoors because of being exposed to the elements. Use the rust remover for concrete, vinyl siding, decks, patios, fencing, docks, plastic, fiberglass, boats, around the pool, and other exterior surfaces.
- Easy To Use: Typical cleaning sprays, bleaches, and soaps aren’t cut out for rust removal. Utilize our special solution as needed to keep your items and surfaces looking clean and like new. Please refer to package instructions for best results.
- Performance Guarantee: Our cleaning products come with a satisfaction guarantee. We will meet or exceed your expectations with our specially-formulated cleaners, proudly made in the USA.

- Heavy Soil and Red Clay Destroyer - Targets stubborn red clay and thick mud on driveways, patios and other concrete areas. Our power washer concrete cleaner stores surfaces fast with strong cleaning power.
- Strong Acid Blend for Deep Penetration – Our Concrete Stain Remover is designed to lift stains that other cleaners cannot touch. Works on concrete slabs, driveways, patios and brick where mud and red clay bond deep in the pores.
- Deep Penetration for Tough Stains - The strong acid blend reaches deep into concrete and brick to loosen stains bonded in the pores. Ideal for driveway cleaner for concrete and outdoor slabs.
- Easy Steps for Big Results - Apply at our rust remover at full power, allow the chemistry to work and rinse clean. Repeat on older or deeper stains as needed.
- Made for Contractors and Homeowners – A reliable cement cleaner for concrete residential driveways or large commercial jobs. Available in 1 Gallon and 4 Gallon Case sizes.
- Targets Tough Sports Stains Helps remove grass, dirt, sweat, and everyday stains commonly found on athletic uniforms and activewear.
- Pre Treat Before Washing Apply directly to stains before laundering to help improve cleaning results in the wash.
- Designed for Athletic Fabrics Suitable for use on jerseys, uniforms, workout clothing, and other washable fabrics.
- Easy Spray Application Spray directly onto stained areas for targeted treatment and convenient use.

- Goodbye Rust: Remove rust stains around the home with a heavy-duty rust removal product trusted for over 60 years. The unique cleaner gel clings to dissolve rust stains on contact for difficult-to-reach places.
- Super Strength: The heavy-duty stain remover is specifically formulated to easily rinse away the toughest rust stains, eliminating the need for scrubbing. This product is septic-friendly when used as directed.
- Multi-Purpose: Rust-colored stains happen for many reasons, especially with high iron, hard water. Use the rust remover for vertical and hard-to-reach surfaces like showers, tubs, sinks, colorfast carpets, tile, and more.
- Easy To Use: Typical cleaning sprays and gels, bleaches, and soaps aren’t cut out for rust removal. Utilize our special solution as needed to keep your items and surfaces looking clean and new. Please refer to package instructions for best results.
- Performance Guarantee: Our cleaning products come with a satisfaction guarantee. We will meet or exceed your expectations with our specially-formulated cleaners, proudly made in the USA.

- Powerful Whitener: Remove tough stains and help restore dingy white clothes with this powerful laundry whitener. The heavy-duty laundry booster works as a spot remover to clean and brighten white clothes, jerseys, baseball pants, and more.
- Removes Stubborn Stains: The heavy-duty mineral-based stain remover gets the job done on white clothing for cleaner, brighter, fresher laundry. It fights to remove yellowing caused by hard water, dirt and red clay, rust, and more.
- Fabric and Septic-Friendly: Stains happen to the best of us. This clothing whitener works on many types of fabrics, including delicates. It’s septic-friendly and can be used in all types of washing machines, including top load, front load, and HE.
- Easy To Use: Bleach liquid cleaners or powders can be too harsh on fabrics. Utilize our whitening powder as a pre-soak or laundry booster to whiten clothing easily and help make it look new. Please read the entire label before using.
- Performance Guarantee: Our cleaning products come with a satisfaction guarantee. We will meet or exceed your expectations with our specially-formulated cleaners.

- The End of All Stains - Save your rug, carpet, clothes, mattress, upholstery from permanent stain damage - Incredible! Stain Remover is here to save the day, Our powerful formula eliminates various stains and odors - from coffee, red wine, oil, dog and cat urine, grease and more.
- Easy to Use, Instant Results - Just spot and blot the stain with Incredible Stain Remover - no washing, rinsing, rubbing, or vacuuming necessary, Gone goes all traces of stain and odor - in just a few seconds, like magic.
- Safe For The Whole Family - Incredible! Stain Remover is tough on stains, but safe for everybody - even children and pets, Our waterbased formula is non-toxic, non-flammable, and non-irritating unlike other harsh cleaners.
- Incredible Value - With 1 bottle of Incredible! Stain Remover there's no need for a separate stain remover and odor eliminator products for your carpet, furniture, mattress and your clothes, Use Incredible! Stain Remover on various surfaces, and upholstery
- Important Notice - Incredible! Stain Remover has gained the trust of American households to remove tough stains and odors in their house, car or workplace. However some stains are impossible to remove and our product cannot remove permanent ink stains (only washable ink), clay, paint, or cooking oils or grease. This liquid is colourless and odorless. Please read the instructions carefully and reach out to us via Amazon if you have any questions.
- Powerful Whitener: Remove tough stains and help restore dingy white clothes with this powerful laundry whitener. The heavy-duty laundry booster works as a spot remover to clean and brighten white clothes, jerseys, baseball pants, and more.
- Removes Stubborn Stains: The heavy-duty mineral-based stain remover gets the job done on white clothing for cleaner, brighter, fresher laundry. It fights to remove yellowing caused by hard water, dirt and red clay, rust, and more.
- Fabric and Septic-Friendly: Stains happen to the best of us. This clothing whitener works on many types of fabrics, including delicates. It’s septic-friendly and can be used in all types of washing machines, including top load, front load, and HE.
- Easy To Use: Bleach liquid cleaners or powders can be too harsh on fabrics. Utilize our whitening powder as a pre-soak or laundry booster to whiten clothing easily and help make it look new. Please read the entire label before using.
- Performance Guarantee: Our cleaning products come with a satisfaction guarantee. We will meet or exceed your expectations with our specially-formulated cleaners.

- Protects and Revives Colors: Maintain the vibrancy of your colored garments with The Pink Stuff Miracle Laundry Oxi Powder Stain Remover. Specially formulated to protect and revive colors, it removes stains without fading your favorite clothes.
- Oxi-Powered Stain Removal: Utilize the power of oxygen to effectively lift and remove stubborn stains like grease, food, and dirt. This stain remover works deep into the fabric to eliminate discoloration while preserving the original color.
- Safe for All Colors: Designed to be gentle on all types of colored fabrics, from bright reds to deep blues. This stain remover ensures that your clothes look as colorful as the day you bought them, wash after wash.
- Versatile Application: Ideal for a wide range of colored clothing, including t-shirts, jeans, and delicate fabrics. Use it in your washing machine for full loads or as a pre-soak treatment for particularly tough stains.
- Trusted Brand for Effective Cleaning: From the makers of The Pink Stuff, a trusted household brand known for delivering high-quality cleaning products. This Oxi Powder Stain Remover continues the tradition of providing reliable and effective solutions for your laundry needs.
Concrete’s Porosity
Concrete, despite being a hard material, is inherently porous. It’s filled with tiny capillaries and air voids that act like sponges, readily absorbing liquids and fine particles. This porosity is a double-edged sword; it allows concrete to breathe and expand/contract without cracking, but it also makes it susceptible to staining, especially from substances like red clay that can permeate its structure.
The Danger of Delay
The longer red clay remains on concrete, the more difficult it becomes to remove. Sunlight can bake the clay particles onto the surface, and repeated wetting and drying cycles can drive the stain deeper. Addressing the stain promptly is critical to achieving satisfactory results.
Gathering Your Tools and Materials
Before you begin the cleaning process, ensure you have all the necessary tools and cleaning agents on hand. This will streamline your efforts and prevent interruptions once you’ve started.
Essential Personal Protective Equipment (PPE)
You will be working with cleaning chemicals, some of which can be corrosive or irritating. Protecting yourself is paramount.
- Safety Glasses or Goggles: To shield your eyes from splashes of cleaning solutions.
- Chemical-Resistant Gloves: To protect your hands from direct contact with detergents and acids. Neoprene or nitrile gloves are generally recommended.
- Long-sleeved Shirt and Pants: To minimize skin exposure.
- Closed-toe Shoes: To protect your feet from chemical spills or falling objects.
If you’re struggling with unsightly marks on your driveway or patio, you might find it helpful to explore effective methods to remove red clay stains from concrete. In addition to the techniques outlined in our guide, you can also check out a related article that discusses DIY gutter cleaning and maintenance, which can help keep your home looking its best. For more information, visit this article to discover how maintaining your gutters can prevent dirt and debris from staining your outdoor surfaces.
Cleaning Equipment
The right equipment makes the job significantly easier and more effective.
- Stiff-bristled Brush: A push broom with stiff synthetic bristles is ideal for scrubbing large areas. For smaller, more ingrained stains, a hand-held scrub brush will be useful. Avoid wire brushes as they can damage the concrete surface.
- Garden Hose with a Spray Nozzle: For rinsing away loose dirt and cleaning solutions. A powerful jet setting is beneficial.
- Bucket: For mixing cleaning solutions.
- Pressure Washer (Optional, but Recommended): A pressure washer can significantly enhance cleaning power, especially for larger or more stubborn stains. If you use one, you must understand the correct techniques to avoid damaging the concrete.
- Absorbent Towels or Rags: For wiping up spills or excess solution.
Cleaning Agents
A variety of cleaning agents can be effective against red clay, ranging from mild detergents to stronger acid-based solutions. You will likely progress through these in increasing order of strength.
- Dish Soap or Laundry Detergent: A simple, alkaline cleaning agent for initial attempts. Look for formulas without bleach.
- Oxyclean or Peroxide-Based Cleaners: These provide a deeper cleaning action and can help lift stains without being overly corrosive.
- Specialized Concrete Cleaners: Many manufacturers offer products specifically formulated for concrete stain removal. These often contain a blend of surfactants and mild acids.
- Muriatic Acid (Diluted): This is a powerful, highly corrosive acid and should be considered a last resort. It’s effective but carries significant risks if not handled properly. You will need to dilute it heavily before use.
- Iron Stain Removers: Products specifically designed to remove iron stains, often found in rust removers, can be highly effective against red clay as iron is the primary culprit. These sometimes contain oxalic acid or phosphoric acid.
Initial Assessment and Preparation
Before applying any cleaning agent, a few preparatory steps will improve the effectiveness of your cleaning process and protect surrounding areas.
Clear the Area
Remove any loose debris, furniture, potted plants, or other items from the concrete surface. This provides an unobstructed workspace and prevents objects from becoming stained or damaged by cleaning solutions.
Protect Nearby Plants and Landscaping
Chemicals used to remove red clay can harm or kill plants. Thoroughly wet surrounding vegetation with water before applying any cleaning solution. You can also cover plants with plastic sheeting or tarpaulins to create a physical barrier. Immediately rinse any overspray that lands on plant material.
Pre-Rinse the Concrete
Use your garden hose with a strong nozzle to spray down the stained area. This removes loose dirt, dust, and superficial clay particles, allowing your cleaning agents to focus on the embedded stains. It also helps to saturate the concrete, which can prevent some cleaning solutions from penetrating too deeply or drying too quickly.
Step-by-Step Cleaning Methods
You will begin with the least aggressive cleaning method and progress to stronger solutions only if necessary. This approach minimizes the risk of damaging your concrete.
Method 1: Detergent and Scrubbing (Mild Stains)
This is your first line of defense for lighter, fresher red clay stains.
- Mix Solution: In a bucket, combine warm water with a generous amount of liquid dish soap or laundry detergent.
- Apply to Stain: Pour or spray the soapy water liberally over the red clay stain, ensuring the entire affected area is saturated.
- Allow to Dwell: Let the solution sit on the stain for 10-15 minutes. This allows the surfactants in the detergent to break down and lift the clay particles.
- Scrub Vigorously: Using your stiff-bristled brush, scrub the stained area with circular motions. Apply firm pressure. You should see the stain begin to lighten or disappear.
- Rinse Thoroughly: Use your garden hose to completely rinse away the soapy water and lifted clay residue. Ensure no detergent residue remains, as it can attract more dirt.
- Assess Results: Allow the concrete to dry completely. If the stain persists, albeit lighter, repeat this method or move to a stronger approach.
Method 2: Oxyclean or Peroxide-Based Cleaners (Moderate Stains)
For stains that didn’t fully succumb to detergent, an oxygen-based cleaner can provide more lifting power.
- Preparation: Pre-rinse the concrete as described above. Ensure the concrete is still damp.
- Mix Solution (if powder): If using powdered Oxyclean, follow the product instructions for mixing with water to create a paste or liquid solution. If liquid, apply directly.
- Apply Generously: Apply the Oxyclean solution or paste directly to the red clay stain. For stubborn spots, a thicker paste might be more effective.
- Allow to Dwell: Let the solution sit for 30 minutes to an hour, or as recommended by the product. For very old or deep stains, you might extend this dwell time, keeping the area moist. Avoid letting it dry out completely.
- Scrub and Rinse: Scrub the area with your stiff-bristled brush. You should observe the stain actively lifting. Rinse thoroughly with water, again ensuring no residue remains.
- Evaluate: After the concrete dries, check for remaining discoloration.
Method 3: Specialized Concrete Cleaner or Iron Stain Remover (Stubborn Stains)
These products are specifically formulated to tackle stubborn stains like red clay (due to their iron-removing properties).
- Safety First: Always read and follow the manufacturer’s instructions for the specific product you are using. Pay close attention to warnings and recommended PPE.
- Application: Apply the cleaner directly to the stained area. Many products are spray-on.
- Dwell Time: Allow the product to dwell for the recommended time, which can vary widely. Do not let it dry on the concrete. If it starts to dry, mist it lightly with water.
- Agitation: Some products recommend light scrubbing during or after the dwell time.
- Rinse Thoroughly: Rinse the area completely with a garden hose or pressure washer. Ensure all chemical residue is removed, especially if the product is acidic.
- Repeat if Necessary: For very stubborn stains, you might need multiple applications.
Method 4: Pressure Washing (Enhancing Any Method)
A pressure washer can dramatically increase the effectiveness of any cleaning agent by providing powerful mechanical agitation.
- Pre-Treat: Apply your chosen cleaning solution (detergent, Oxyclean, specialized cleaner) and allow it to dwell as per instructions.
- Select Nozzle and Pressure: Start with a wider fan tip (e.g., 25-degree or 40-degree) and a lower pressure setting. Gradually increase pressure or decrease the fan angle if needed, but always observe the concrete surface for any signs of damage (e.g., etching, pitting). Avoid using a zero-degree (pencil jet) nozzle as it can easily damage concrete.
- Maintain Distance: Hold the pressure washer wand at a consistent distance (typically 6-12 inches) from the concrete.
- Overlap Strokes: Use overlapping, even strokes to clean the area uniformly. Avoid staying in one spot for too long.
- Rinse Thoroughly: The pressure washer itself provides an excellent rinse. Ensure all cleaning solution and lifted debris are removed.
Method 5: Muriatic Acid (Last Resort for Severe Stains)
This is a highly corrosive acid and should only be used if all other methods have failed. Extreme caution is required.
- High-Risk Procedure: Muriatic acid can etch concrete, damage surrounding materials, and cause severe burns if it contacts skin or eyes. Ensure you have all PPE, including a respirator if working in an enclosed area.
- Dilution is Key: Never use muriatic acid at full strength. Always follow the manufacturer’s exact dilution ratios, typically 1 part acid to 10-20 parts water. Always add acid to water, never water to acid, to prevent dangerous splashing.
- Pre-Wet Thoroughly: Drench the concrete with water before applying the acid solution. This helps to dilute the acid further and prevents it from over-etching.
- Apply Sparingly: Apply the diluted acid solution only to the stained areas using a plastic watering can or sprayer.
- Short Dwell Time: Let the acid work for a very short period, typically 30 seconds to 2 minutes. Watch for effervescence (bubbling), which indicates the acid is reacting.
- Neutralize and Rinse: Immediately after the dwell time, neutralize the acid. You can use baking soda mixed with water to create a slurry and pour it over the treated area, or simply rinse excessively with copious amounts of water. Continue rinsing for several minutes to ensure all acid is flushed away.
- Inspect: Allow the concrete to dry and inspect the results. If the stain persists, consider professional help rather than attempting further acid applications yourself.
Post-Cleaning Care and Prevention
Once you have successfully removed the red clay stain, taking a few extra steps can help maintain your concrete’s appearance and prevent future staining.
Thorough Rinsing
Regardless of the cleaning method you use, a thorough rinse is critical. Any residual cleaning solution, especially acidic ones, can continue to react with the concrete or leave behind a residue that attracts new dirt.
Inspect for Damage
After allowing the concrete to dry completely, inspect the area closely for any signs of damage, such as etching, discoloration (other than the original stain), or surface degradation. This is particularly important if you used stronger chemicals or a pressure washer at a high setting.
Sealing Your Concrete (Preventative Measure)
Applying a high-quality penetrating concrete sealer is one of the most effective ways to prevent future red clay stains.
- How it Works: Sealers create a protective barrier that fills the concrete’s pores, making it less absorbent. This prevents dirt, oil, and contaminants like red clay from soaking in.
- Application: Ensure the concrete is completely clean and dry before applying a sealer. Follow the manufacturer’s instructions regarding application method, drying time, and reapplication frequency (typically every 1-5 years depending on traffic and product).
- Benefits: Beyond stain prevention, sealers can also help prevent efflorescence, cracking from freeze-thaw cycles, and general wear and tear, extending the lifespan of your concrete.
Prompt Clean Up of Spills
If you live in an area prone to red clay, make it a habit to clean up any spills or tracked-in dirt as quickly as possible. The faster you address a fresh stain, the easier it will be to remove with just water and a brush, much reducing the need for aggressive cleaning agents. Be proactive, and your concrete will remain cleaner for longer.
Leave a Reply