
Stripping paint can be challenging, especially when dealing with multiple layers of old, stubborn paint. Pressure washing offers an efficient alternative to traditional methods by using high-pressure water to remove paint from wood, metal, or concrete surfaces. This technique saves time and reduces the need for potentially harmful chemicals, making it more environmentally friendly.
Pressure washing provides significant advantages over conventional paint removal methods like scraping or sanding. It allows for faster coverage of large areas with less physical effort. The water’s force effectively lifts paint layers from the underlying surface without causing damage to the base material.
This article provides comprehensive guidance for successfully completing your pressure washing paint removal project.
Key Takeaways
- Pressure washers can effectively strip paint when used correctly and safely.
- Proper safety gear and equipment are essential to prevent injury during the process.
- Preparing the surface beforehand ensures better paint removal results.
- Correct pressure washer settings are crucial to avoid damaging the underlying material.
- Thorough cleanup and responsible disposal of paint waste protect the environment.
Safety Precautions and Equipment Needed
Before you dive into the paint-stripping process, it’s crucial to prioritize safety. Working with a pressure washer involves high-pressure water jets that can cause injury if not handled properly. Always wear protective gear, including safety goggles to shield your eyes from flying debris, gloves to protect your hands from chemicals and sharp edges, and sturdy footwear to keep your feet safe.
Additionally, consider wearing a mask to avoid inhaling any dust or paint particles that may become airborne during the process.
Ensure that you have a suitable nozzle for your machine; a 15-degree or 25-degree nozzle is typically effective for stripping paint.
You may also want to invest in a chemical stripper if the paint is particularly stubborn. A drop cloth or tarp can help catch any debris and paint chips that may fall during the process, making cleanup easier. Lastly, have a bucket of water nearby for rinsing off any excess chemicals or paint residue from your tools and surfaces.
Preparing the Surface for Pressure Washing

Preparation is key when it comes to stripping paint effectively. Start by clearing the area of any furniture, plants, or obstacles that could interfere with your work. This not only creates a safer environment but also ensures that you have ample space to maneuver your pressure washer.
If you’re working on a vertical surface like a fence or wall, consider placing a tarp at the base to catch any falling paint chips. Next, inspect the surface you plan to strip. Look for any loose or peeling paint that can be easily removed by hand before using the pressure washer.
This initial step can save you time and effort later on. If there are any areas with mold or mildew, treat them with a suitable cleaner before proceeding. This will not only improve the appearance of the surface but also ensure that the new paint adheres properly once you’re finished with the stripping process.
Setting Up the Pressure Washer
Once your surface is prepared, it’s time to set up your pressure washer. Begin by selecting an appropriate location for your machine, ensuring it’s on stable ground and within reach of a power source or water supply. If you’re using an electric pressure washer, make sure to use an outdoor-rated extension cord to prevent any electrical hazards.
For gas-powered models, check the fuel levels and ensure that all connections are secure. After positioning your pressure washer, attach the correct nozzle based on your project’s needs. A wider spray pattern is generally safer for delicate surfaces, while a narrower spray can be more effective for tougher paint removal tasks.
Adjust the pressure settings according to the surface material; softer materials like wood may require lower pressure to avoid damage, while concrete can handle higher settings. Finally, test the pressure washer on a small, inconspicuous area to ensure that it’s functioning correctly and that you’re comfortable with its operation.

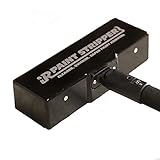
- CITRISTRIP Paint & Varnish Stripping & Removing Gel is easy to use.
- Stays wet and active for up to 24 hours allowing stripping of multiple layers in one step.
- Removes dried latex and oil-based paint, varnish, lacquer, polyurethane and shellac.
- Strips multiple layers from wood, metal and masonry surfaces.
- Contains no methylene chloride or NMP (N-Methylpyrrolidone).
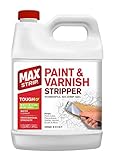
- DESIGNED TO REMOVE PAINT AND VARNISH FROM MULTIPLE SURFACES - Remove Aftermarket Paints, Latex, Polyurethane, Shellac, Varnish, Acrylic, Oil Based Coatings and More in usually a Single Application!
- EASY TO USE WITHOUT CAUSTIC CHEMICALS - Contains NO Methylene Chloride or NMP. Apply to the surface and check every 15 minutes till it's ready. Set times will vary. Remove with scraper. No fuss, no muss!
- THE "DO-IT-YOURSELF" CHOICE - Powerful enough for painting contractors and restorers, but user-friendly enough for all your DIY home projects.
- NO HARSH FUMES OR UNPLEASANT ODOR - Our Paint Stripper is Ideal for use in confined or small spaces.
- THE IDEAL STRIPPING CHOICE - Very effective at removing most kinds of aftermarket paints and coatings. Not designed for removal of deck coatings, factory finished, or baked on coatings ie. vehicle paint.

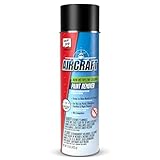
- Fast Acting Formula: Removes tough 2K automotive coatings, including epoxies and urethanes, stripping to bare metal within 45 minutes.
- Versatile Use: Effective on a variety of surfaces such as metal, aluminum, and most plastics; ideal for automotive and general DIY use. Specifically designed to tackle acrylics, lacquers, polyurethanes, baked enamels, and more for superior finishing.]: Not for use on aircraft. Do not use to strip bathtubs.
- Professional Grade: Specifically designed to tackle acrylics, lacquers, polyurethanes, baked enamels, and more for superior finishing.
- Compliance Assured: Patent-pending, VOC Compliant in all states ensuring safe use in VOC-restricted areas; avoids harsh chemicals and excessive fumes.
- Technical Data: Review the available Technical Data Sheet for important information about properly using and storing paint removers. Also find useful tips to enhance your project efficiency.

- DESIGNED TO REMOVE PAINT AND VARNISH FROM MULTIPLE SURFACES - Remove Aftermarket Paint, Latex, Polyurethane, Shellac, Varnish, Acrylic, Oil Based Coatings and More in usually a Single Application!
- EASY TO USE WITHOUT CAUSTIC CHEMICALS - Contains NO Methylene Chloride or NMP. Apply to the surface and check every 15 minutes till it's ready. Set times will vary. Remove with scraper. No fuss, no muss!
- THE "DO-IT-YOURSELF" CHOICE - Powerful enough for painting contractors and restorers, but user-friendly enough for all your DIY home projects.
- NO HARSH FUMES OR UNPLEASANT ODOR - Ideal for use in confined or small spaces with a fresh citrus scent.
- THE IDEAL STRIPPING CHOICE - Very effective at removing most kinds of aftermarket paints and coatings. Not designed for removal of deck coatings, factory finished, or baked on coatings ie. vehicle paint.

- DESIGNED TO REMOVE PAINT AND VARNISH FROM MULTIPLE SURFACES - Remove Aftermarket Paints, Latex, Polyurethane, Shellac, Varnish, Acrylic, Oil Based Coatings and More in usually a Single Application!
- EASY TO USE WITHOUT CAUSTIC CHEMICALS - Contains NO Methylene Chloride or NMP. Apply to the surface and check every 15 minutes till it's ready. Set times will vary. Remove with scraper. No fuss, no muss!
- THE "DO-IT-YOURSELF" CHOICE - Powerful enough for painting contractors and restorers, but user-friendly enough for all your DIY home projects.
- NO HARSH FUMES OR UNPLEASANT ODOR - Our Paint Stripper is Ideal for use in confined or small spaces.
- THE IDEAL STRIPPING CHOICE - Very effective at removing most kinds of aftermarket paints and coatings. Not designed for removal of deck coatings, factory finished, or baked on coatings ie. vehicle paint.
- [Fast Acting Formula: Removes tough 2K automotive coatings, including epoxies and urethanes, stripping to bare metal within 45 minutes.]:
- [Versatile Use: Effective on a variety of surfaces such as metal, aluminum, and most plastics; ideal for automotive and general DIY use. Clings to vertical surfaces, enhancing usability and efficiency in your projects]:
- [Professional Grade: Specifically designed to tackle acrylics, lacquers, polyurethanes, baked enamels, and more for superior finishing.]:
- [Compliance Assured: Patent-pending, VOC Compliant in all states ensuring safe use in VOC-restricted areas; avoids harsh chemicals and excessive fumes.]:
- [Technical Data]: Review the available Technical Data Sheet for important information about properly using and storing paint removers. Also find useful tips to enhance your project efficiency.]:

- DESIGNED TO REMOVE PAINT AND VARNISH FROM MULTIPLE SURFACES - Remove Aftermarket Paint, Latex, Polyurethane, Shellac, Varnish, Acrylic, Oil Based Coatings and More in usually a Single Application!
- EASY TO USE WITHOUT CAUSTIC CHEMICALS - Contains NO Methylene Chloride or NMP. Apply to the surface and check every 15 minutes till it's ready. Set times will vary. Remove with scraper. No fuss, no muss!
- THE "DO-IT-YOURSELF" CHOICE - Powerful enough for painting contractors and restorers, but user-friendly enough for all your DIY home projects.
- NO HARSH FUMES OR UNPLEASANT ODOR - Ideal for use in confined or small spaces with a fresh citrus scent.
- THE IDEAL STRIPPING CHOICE - Very effective at removing most kinds of aftermarket paints and coatings. Not designed for removal of deck coatings, factory finished, or baked on coatings ie. vehicle paint.

- 🧪 Powerful Heavy-Duty Formula – Quickly removes tough paint, epoxy, polyurethane, lacquer, and varnish, saving time and hard labor.
- 🪵 Safe for Multiple Surfaces – Works effectively on wood, metal, and masonry, perfect for furniture, doors, cabinets, and renovation projects.
- 🧤 Gloves Included for Safe Application – Comes with Centaurus AZ protective gloves to ensure safe, clean, and controlled application of the stripper without skin contact or irritation.
- ⚡ Fast-Acting Performance – Penetrates multiple layers of coatings, reducing the need for sanding or repeat applications.
- 👷 DIY & Professional Use – Ideal for contractors, woodworkers, and home DIYers looking for professional-grade stripping results.

- High quality product
- Best paint stripping solution
- Does not damage plastic surfaces
- Specially designed for modelling
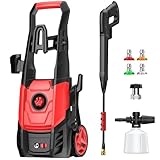
Stripping the Paint with the Pressure Washer
| Parameter | Recommended Value | Description |
|---|---|---|
| Pressure Level | 2500 – 3000 PSI | Optimal pressure range for effective paint stripping without damaging the surface |
| Nozzle Size | 15° or 25° | Angle of spray for efficient paint removal; narrower angles increase pressure |
| Water Temperature | Cold or Warm (up to 120°F) | Warm water can help soften paint for easier removal, but avoid hot water to prevent damage |
| Distance from Surface | 6 – 12 inches | Maintains effective paint removal while minimizing surface damage |
| Spray Angle | 45° to Surface | Helps to peel paint off rather than gouge the surface |
| Duration per Area | 5 – 10 seconds | Time spent on each section to avoid surface damage and ensure thorough paint removal |
| Safety Gear | Gloves, Goggles, Protective Clothing | Essential for protecting user from paint chips and high-pressure water |
| Surface Type | Wood, Concrete, Metal | Common surfaces suitable for paint stripping with a pressure washer |
With everything set up and ready to go, it’s time to start stripping the paint. Begin by holding the pressure washer wand at a slight angle and maintaining a distance of about 12 to 18 inches from the surface. This distance helps prevent damage while still delivering enough force to remove the paint effectively.
Start at one end of the surface and work your way across in even strokes, overlapping each pass slightly to ensure complete coverage. As you work, pay attention to how the paint reacts to the water pressure. In some cases, you may need to adjust your technique—either by changing the angle of the wand or moving closer to the surface if the paint isn’t coming off as expected.
Be patient; some areas may require multiple passes or additional treatment with a chemical stripper if they are particularly stubborn. Remember to take breaks as needed; prolonged use of a pressure washer can be tiring and may lead to fatigue.
Cleaning Up and Disposing of Paint Waste

Once you’ve successfully stripped the paint from your surface, it’s time to clean up and dispose of any waste properly. Start by rinsing off any remaining paint chips and debris from both the surface and your equipment. Use a garden hose or bucket of water for this step, ensuring that you don’t wash any contaminants into storm drains or natural waterways.
When it comes to disposing of paint waste, follow local regulations regarding hazardous materials. Many areas have specific guidelines for disposing of old paint and chemicals safely. If possible, collect the paint chips and debris in a sealed bag or container for proper disposal at a designated facility.
This not only keeps your environment clean but also ensures that you’re following best practices for safety and sustainability.
Tips for Successful Paint Stripping
To achieve optimal results when stripping paint with a pressure washer, consider these helpful tips. First, always work in manageable sections rather than trying to tackle an entire surface at once. This approach allows you to focus on each area thoroughly and ensures that you don’t miss any spots.
Additionally, be mindful of weather conditions; working on a dry day will help prevent moisture from interfering with your paint removal efforts. Another important tip is to keep your pressure washer maintained and in good working order. Regularly check hoses for leaks and ensure that all connections are secure before starting your project.
If you encounter particularly stubborn paint spots, don’t hesitate to use a combination of methods—such as scraping or applying chemical strippers—alongside pressure washing for more effective results.
Conclusion and Final Thoughts
Stripping paint with a pressure washer can be an efficient and effective way to rejuvenate surfaces in need of a makeover. By following proper safety precautions and preparing adequately, you can tackle this project with confidence and ease. Remember that patience is key; while pressure washing can speed up the process significantly, some areas may require extra attention.
As you complete your project, take pride in your work knowing that you’ve not only improved the appearance of your surfaces but also done so in an environmentally conscious manner by minimizing chemical use and properly disposing of waste. With these skills under your belt, you’ll be well-equipped for future home improvement projects that require a fresh start!
If you’re looking to strip paint effectively using a pressure washer, it’s essential to understand the right techniques and equipment to use. For more insights on how to maximize your pressure washing experience, you might find this article on the best pressure washers for cars particularly useful. While it focuses on car cleaning, the information about pressure washer capabilities can also be applied to paint stripping projects, ensuring you choose the right machine for the job.


Leave a Reply