
Before you embark on your outdoor tile and grout cleaning mission, a bit of preparation will save you time and effort in the long run. Don’t underestimate the importance of these initial steps.
Assessing the Landscape
Take a good look at your outdoor tiled areas. What kind of tile are you dealing with? Is it ceramic, porcelain, natural stone like slate or travertine, or perhaps something else entirely? Different materials have varying cleaning requirements and sensitivities to certain chemicals.
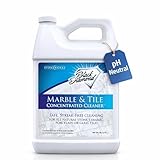
- Safe for All Natural Stone – Gently cleans marble, travertine, granite, slate, limestone, ceramic, and porcelain tile without damage or dulling the surface.
- Streak-Free, No-Rinse Formula – Leaves floors spotless with no residue or film. Enjoy a clean, natural shine after every mop.
- Highly Concentrated – Just 2–4 oz. per gallon delivers powerful results. One bottle goes a long way, saving time and money.
- Eco-Friendly & Family-Safe – Non-toxic and biodegradable. Safe for daily use around kids, pets, and food areas.
- pH Neutral for Stone Protection – Specially formulated to preserve natural stone beauty. Won’t etch, strip sealers, or cause surface damage.
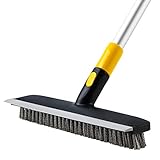
- Floor Scrub Brush 2 in 1 Scrape and brush Push Broom Effective, Easy and Save Effort Brush and scraper 2 in 1 design floor scrub brush with stiff bristle and rubber squeegee; Strong cleaning ability; Brush and scrape steps to easily remove the stain, stubborn grime, dirty water, and dust; Improve effectiveness when you doing housework
- Floor Scrub Brush 2 in 1 Scrape and brush Push Broom Ergonomic Principle: The Angle of the pole and brush part conforms to the ergonomic principle, which can be used to use the broom brush with less effort, so that cleaning can be simple and convenient
- Floor Scrub Brush 2 in 1 Scrape and brush Push Broom Telescopic Pole: The iron pole length can be adjusted from 45.3 inches to 55.9 inches, you can just open the lock on the pole to adjust, so you don't need to bend your back
- Stiff Bristle Floor Scrub Brushes: The bristle brush head is stiff and good for removing stubborn stains. The scrubbing brush is made by PP material and iron, sturdy and durable. After removing the stain, you can also use the scraper part to remove it
- Multi Occasion Use: According to the design of human mechanics, the floor cleaning brush and floors are designed at a 45 degree labor saving angle. Wet or Dry use, the cleaner brush tool can be widely used in tile floor, hardwood floor, glass surface and cement floor like tub, bathroom, kitchen, shower, wall, garage and patio

- Wet & Forget Ready To Use Outdoor Cleaner comes with a high-capacity trigger sprayer for quick application to smaller surfaces; removes green and black stains caused by moss, mold, mildew, and algae, no scrubbing, no rinsing, no pressure washing, just wet it and forget it on multiple surfaces including, porch steps, headstones, fountains, planters, concrete, canvas, and upholstery
- Use attached sprayer apply generously to dry surface on a cool day to avoid rapid evaporation of product, do not rinse, apply when rain is not forecasted within 4-5 hours, apply when the temperature is above 32° F
- Cleans over time with the wind and rain, green stains clean up within 1-2 weeks, black stains or heavy, stubborn stains can take several months, long-established stains may take 6-12 months; surfaces can stay clean up to 1 year or longer
- It is bleach free and non-acidic; spray 100 feet away from lakes, ponds, rivers, and streams and flush plants with water before and after application
- Each bottle treats 60 to 180 square feet; heavy stained and porous surfaces will absorb more product

- CLEANS STAINS CAUSED BY ORGANIC GROWTH: 30 SECONDS Outdoor Cleaner rapid cleans stains caused by algae, mold, mildew and moss
- Safe For Lawn and Plants: When used as directed, 30 Seconds Outdoor Cleaner will not harm your lawn, trees, shrubs, or landscaping.
- EASY TO USE: Just spray on to the surface you would like to clean and hose off! No more pressure washing
- EFFECTIVE FOR MULTIPLE SURFACES: Works great on wood decks, concrete sidewalks, asphalt driveways, brick walls, most canvas awnings, plastic outdoor furniture, vinyl siding & more!

- Professional concentrate cleans decks, siding, driveways, and patios - perfect for homeowners preparing for BBQs, real estate agents staging homes, or contractors finishing jobs.
- Peroxide-powered formula safely cleans wood, vinyl, concrete, brick, and composite surfaces without harsh chemicals - giving families peace of mind around children and pets.
- Covers up to 6,400 sq. ft. per bottle, helping weekend warriors and maintenance crews save money versus hiring pressure washing services while tackling spring cleaning projects.
- Ideal for businesses maintaining storefronts, homeowners restoring outdoor furniture, and anyone removing stubborn grime from driveways, fences, and walkways customers and guests see daily.

- REMOVE TOUGH STAINS: Home Armor Pressure Wash Concentrate blasts away stains from dirt, grime, algae, mold and mildew with professional strength.
- 2X CLEANING POWER of ordinary outdoor cleaners. The Refill Cleaning Cartridge contains super-concentrated cleaning tablets in an easy-to-use cartridge refill system.
- VISIBLE RESULTS IN SECONDS: This Home Armor outdoor cleaner delivers visible results, cleaning and brightening a variety of different surfaces in seconds.
- MULTI-SURFACE OUTDOOR CLEANER that's ideal for use on brick, wood, concrete and vinyl. Do not use on cedar or redwood that is less than 2 years old and avoid contact with metal surfaces, clothing, carpet, fabrics, floor coverings or vegetation.
- DIRECTIONS FOR USE: Attach hose to bottle, ensure it is in the "OFF" position. Turn water on and rinse surrounding plants with water. Turn to "CLEAN" or "CLEAN+" and spray surface. Wait 10 minutes and then rinse surface and surrounding plants again.

- Powerful grout & tile cleaning formula: Goo Gone Grout & Tile Cleaner effectively removes tough stains, dirt, mold, mildew, soap scum, and hard water stains from bathroom and kitchen surfaces. Perfect for deep cleaning shower tiles, bathroom floors, tub surrounds, and countertops without harsh scrubbing.
- Safe for all tile surfaces: Specially formulated to be safe on ceramic, porcelain, natural stone, tile floors, fiberglass, and grout lines. Won't damage or discolor surfaces when used as directed. Ideal for both routine maintenance and deep cleaning projects throughout your home.
- Professional-strength bathroom cleaner: This 28 fl oz spray bottle delivers professional cleaning power that penetrates deep into grout lines and porous tile surfaces. Cuts through years of built-up grime, leaving your bathroom sparkling clean with a fresh scent.
- Easy-to-use spray application: Ready-to-use formula requires no mixing or dilution. Simply spray directly on stained grout or tile surfaces, let penetrate for 2-3 minutes, scrub lightly if needed, and rinse clean. Works on vertical and horizontal surfaces including tile shower walls and tile floors.
- Trusted Goo Gone quality: From the makers of America's trusted adhesive remover brand, this specialized grout and tile cleaner brings the same reliability and effectiveness to your toughest bathroom cleaning challenges. Made in USA with quality ingredients.

- POWERFUL NON-ACID CLEANER: Effectively removes grout haze, grease, and dirt from ceramic, porcelain, glass, grout, and natural stone surfaces without harsh acids
- SAFE FOR ACID-SENSITIVE SURFACES: Gentle, water-based formula cleans deeply without damaging finishes on marble, granite, and other delicate stones
- INDUSTRIAL STRENGTH: Penetrates tough stains and buildup for excellent results on counters, floors, showers, and more
- RESIDUE-FREE FINISH: Leaves surfaces clean and streak-free with no oily or soapy residue
- VERSATILE INDOOR & OUTDOOR USE: Ideal for kitchens, bathrooms, and exterior stonework; covers up 43-87 sq. ft. per quart

- Use In Bathroom Tile and Grout, Bathtub, Soap Scum, Showers, Drywall, Wood, Fences, Decks, Vinyl Sidng, Concrete Floors, Kitchen, Brick Walls, and other areas where mold and mildew can grow
- NO SCRUBBING REQUIRED: Avoid the hassle and backbreaking work of scrubbing tough stains
- 2X STRONGER FORMULA: 2X Stronger than 30 SECONDS Outdoor Cleaner
- BRIGHTER RESULTS INSTANTLY: Noticeably brightens surfaces, removing mold and mildew stains as you watch
- REMOVES BLACK MOLD STAINS & MORE

- REMOVES STAINS FROM ORGANIC GROWTH ON YOUR OUTDOOR SURFACES: 30 SECONDS Outdoor cleaner cleans stains from mold, mildew, dirt and grime
- POWERFUL CONCENTRATED FORMULA: Our concentrated formula is easy use. Simply mix a 1:1 ratio with water and you are ready for a rapid clean
- IMMEDIATE RESULTS ON A VARIETY OF OUTDOOR SURFACES: Works on many outdoor surfaces including decks, composite and stained surfaces. Concrete, bricks and masonry. Gutters, siding, canvas, plastic and stucco. Fences, arbors and painted surfaces. You can see results immediately!
- PLANT AND LAWN SAFE: When used as directed, 30 SECONDS outdoor cleaner is safe to use around landscaping, plants, and your lawn. The formula breaks down once rinsed into the soil.
Gathering Your Arsenal
You’ll need more than just a bucket and sponge for this task. Assemble your cleaning toolkit before you begin.
- Protective Gear: Gloves, eye protection, and old clothing are essential. You’ll be working with cleaning solutions and potentially stubborn grime.
- Brushes and Scrubbers: A stiff-bristled non-metallic brush will be your primary weapon for grout lines. For the tile surface, a softer brush or a larger scrub brush might be more appropriate. Avoid wire brushes on most tiles, as they can scratch.
- Cleaning Solutions: We’ll cover specific solutions later, but have general-purpose outdoor cleaners, bleach (for specific issues), and possibly a pH-neutral stone cleaner on hand.
- Hose with a Nozzle: A strong jet of water is crucial for rinsing.
- Pressure Washer (Optional): While effective, pressure washers need to be used with caution, especially on older or more porous grout.
- Buckets: Several buckets will be useful – one for clean water, one for cleaning solutions, and perhaps one for rinsing tools.
- Squeegee or Mop: For larger tiled areas, a squeegee can help remove excess water quickly.
- Towel or Rags: For drying or spot cleaning.
Clearing the Deck
Remove all furniture, planters, rugs, and other movable items from the tiled area. This provides unobstructed access and prevents accidental damage to your belongings or the spread of cleaning solutions. Sweep or blow away loose debris, leaves, and dirt. This initial dry cleaning prevents mud from forming when you introduce water, making the actual scrubbing more effective.
If you’re looking for the best way to clean outdoor tile and grout, you might find it helpful to explore various cleaning tools and techniques that can enhance your efforts. A related article that discusses essential tools for DIY projects, including cleaning, is available at Must-Have Tools for DIY Electrical Repairs at Home. This resource can provide insights into the equipment that can make your outdoor cleaning tasks more efficient and effective.
The Art of Pre-Treatment and Spot Removal
Once the area is clear and you have your tools, it’s time to tackle superficial grime and any specific stains that might be present.
Sweeping and Blowing Away Debris
As mentioned, this step is crucial. Use a stiff broom, leaf blower, or even a shop vacuum to remove all loose dirt, leaves, twigs, and any other solid debris. This prevents the formation of muddy sludge which can make the actual cleaning process dirtier and less effective. Ignoring this step often leads to simply pushing dirty water around.
Addressing Mold and Mildew
Outdoor environments are prime breeding grounds for mold and mildew. These microscopic organisms not only look unsightly but can also degrade grout over time.
- Initial Scrubbing: For light mold and mildew, a stiff brush and a general-purpose outdoor cleaner might be enough. Scrub vigorously to dislodge the growth.
- Bleach Solution (for non-stone tiles): For more stubborn mold and mildew on ceramic, porcelain, or concrete tiles (never on natural stone), a diluted bleach solution can be effective. Mix one part bleach with four parts water. Apply the solution, let it sit for 10-15 minutes, then scrub and rinse thoroughly. Always test in an inconspicuous area first.
- Commercial Mold Removers: Several commercial products are specifically designed for outdoor mold and mildew. Follow the manufacturer’s instructions carefully. These are often safer alternatives for natural stone if specifically labeled as such.
Tackling Stubborn Stains
Outdoor tiles are exposed to a variety of stain-causing agents, from rust to grease.
- Grease and Oil Stains: For fresh grease stains, apply an absorbent material like cat litter or baking soda to soak up as much as possible. For set-in stains, a degreaser specifically designed for outdoor use is often necessary. Apply, let it sit, scrub, and rinse.
- Rust Stains: Rust removers are available, but ensure they are safe for your specific tile type. Many rust removers contain oxalic acid, which can etch certain stones. Test in an inconspicuous area. Lemon juice and salt can sometimes help with minor rust stains on non-porous surfaces.
- Efflorescence: This white, powdery substance is caused by salt deposits leaching from the grout or concrete. Mild acid-based cleaners (like distilled white vinegar) can often dissolve efflorescence. Apply, scrub, and rinse. For persistent efflorescence, commercial efflorescence removers are available.
- Organic Stains (Leaves, Berries): Most organic stains can be removed with a good scrub and a general outdoor cleaner or a diluted bleach solution (again, not for natural stone). Letting the cleaner sit for a bit can help break down the organic matter.
Deep Cleaning Your Tiles

Now that the superficial grime and stains are addressed, it’s time for a thorough cleaning of the entire tiled surface. This is where most of the elbow grease will come into play.
Choosing the Right Cleaner
The type of tile you have dictates the appropriate cleaner. Using the wrong product can cause irreversible damage or discoloration.
- Ceramic and Porcelain: These tiles are generally quite resilient. Most general-purpose outdoor cleaners, mild detergents, or even a diluted bleach solution (1:4 with water) are safe. Ensure the product states it is suitable for outdoor use.
- Natural Stone (Travertine, Slate, Limestone, Sandstone, Granite): These require a more delicate approach. Avoid acidic cleaners (vinegar, lemon juice, many bleach-based products) as they can etch the stone. Also avoid ammoniated cleaners. Opt for pH-neutral stone cleaners specifically formulated for outdoor natural stone. A mild dish soap diluted in warm water can also be used for light cleaning.
- Concrete Pavers/Tiles: Concrete is porous. A general-purpose outdoor cleaner or a diluted TSP (Trisodium Phosphate) solution can be effective. Be cautious with strong acids, as they can damage the concrete.
- Quarry Tile: Similar to ceramic and porcelain, quarry tile is durable. A general-purpose outdoor cleaner or a mild detergent will work well.
Standard Cleaning Procedure
Once you have your chosen cleaner, follow these steps for effective deep cleaning.
- Wet the Surface: Before applying any cleaner, thoroughly wet the entire tiled area with water. This helps to loosen dirt and prevents the cleaning solution from drying too quickly, allowing it to work more effectively. It also dilutes the cleaner slightly upon contact, reducing the risk of harsh chemical reactions.
- Apply Cleaner: Follow the manufacturer’s instructions for your chosen cleaner. Typically, you’ll apply it directly to the surface or dilute it in a bucket of water and then apply it. Work in manageable sections to prevent the cleaner from drying.
- Agitate and Scrub: This is where your brushes come in. Use a stiff-bristled brush (non-metallic) to scrub the tile surface and especially the grout lines. Pay extra attention to areas with visible grime or discoloration. Let the cleaner sit for the recommended dwell time (usually 5-15 minutes) to allow it to break down dirt.
- Thorough Rinsing: This is perhaps the most critical step. Rinse the entire area thoroughly with a hose, ensuring all traces of the cleaning solution are removed. Residue can attract dirt, leave streaks, or even damage the tile or grout over time. A strong jet from a nozzle helps dislodge loosened dirt and soap film.
Grout Revival: Bringing Back the Sparkle

Grout is often the most neglected part of outdoor tile, yet it plays a crucial role in both aesthetics and the structural integrity of your tiled surface. Dirty grout can make even clean tiles look dull.
The Vulnerability of Grout
Outdoor grout is constantly exposed to elements: rain, sunlight, foot traffic, and various organic matter. Its porous nature makes it susceptible to absorbing dirt, mildew, and stains, often turning black, green, or brown.
Dedicated Grout Cleaners
While a general outdoor cleaner might help, for truly grimy grout, a dedicated grout cleaner is often necessary.
- Acidic Grout Cleaners (for non-stone tiles): Many commercial grout cleaners for ceramic and porcelain tiles are acid-based. These are very effective at dissolving dirt, efflorescence, and mildew. However, never use these on natural stone grout, as they will etch and damage it. Always test in an inconspicuous area first.
- Oxygenated Bleach-Based Grout Cleaners: These are often gentler alternatives and can be effective on a wider range of tiles, though always check compatibility with natural stone. The oxygen-based cleaners foam up to lift dirt.
- Baking Soda and Hydrogen Peroxide Paste: For a more natural and generally safer option, create a paste with baking soda and hydrogen peroxide. Apply it to the grout lines, let it sit for 10-15 minutes, then scrub with a stiff brush. This mixture is non-acidic and safe for most tile and grout types.
- Steam Cleaners: A handheld steam cleaner can be very effective at loosening dirt and grime from grout lines without the need for chemicals. The high heat and pressure can sanitize as well.
The Grout Scrubbing Technique
Patience and a good brush are key.
- Targeted Application: Apply your chosen grout cleaner directly to the grout lines. Working in small sections prevents the cleaner from drying out.
- Focused Scrubbing: Use a stiff-bristled grout brush, or even an old toothbrush for tight spots. Scrub vigorously along the length of each grout line. You should see dirt lifting as you scrub.
- Repeat as Necessary: For heavily soiled grout, you may need to apply the cleaner and scrub in multiple passes.
- Immediate Rinsing: After scrubbing a section, rinse thoroughly with clean water before moving to the next section. Do not allow the grout cleaner to dry on the tile surface, as it can leave streaks or etching.
When considering the best way to clean outdoor tile and grout, it’s essential to understand the tools and techniques that can make the job easier and more effective. A related article discusses how to choose the right nozzle for your pressure washer, which can significantly impact your cleaning results. By selecting the appropriate nozzle, whether it’s a rotary, turbo, or fan tip, you can enhance your cleaning process and achieve a spotless finish. For more insights on this topic, check out the article on choosing the right nozzle.
The Finishing Touches and Future Protection
| Methods | Effectiveness | Difficulty |
|---|---|---|
| Scrubbing with a brush and soapy water | High | Medium |
| Pressure washing | Very High | High |
| Baking soda and vinegar solution | High | Low |
| Commercial tile and grout cleaner | Very High | Low |
Your tiles are now sparkling, but the job isn’t quite done. A few final steps will ensure they stay clean longer and remain protected from the elements.
The Power of Pressure Washing (Use with Caution)
A pressure washer can be an invaluable tool for outdoor tile and grout cleaning, but it requires careful handling.
- Appropriate PSI: Use a low-pressure setting (under 1500 PSI for most outdoor tiles and grout). Too high a pressure can damage grout, loosen tiles, or etch softer stone.
- Fan Nozzle: Always use a fan-tip nozzle, not a concentrated stream. A concentrated stream can cut through grout or stone.
- Maintain Distance: Keep the nozzle at least 12-18 inches away from the surface. Get closer only if necessary and with extreme caution.
- Test Area: Always test on an inconspicuous area first to ensure it doesn’t cause damage.
- Risk for Grout: Be especially careful around grout. Old or sandy grout can easily be eroded by a pressure washer, leading to bigger problems down the line. If your grout appears weak or crumbly, avoid pressure washing it directly.
Final Rinse and Drying
After all cleaning and scrubbing, perform one last, exhaustive rinse of the entire area. Remove all residue from the tiles and surrounding surfaces. Allow the tiles to air dry completely. Walking on wet, freshly cleaned tiles can transfer dirt back onto them.
Why Sealing is Crucial (Especially for Natural Stone and Grout)
Sealing is an often-overlooked but vital step in maintaining outdoor tiles, particularly natural stone and grout.
- Protection from Stains: Sealers create a barrier that repels water, oil, and other potential stains, preventing them from penetrating the porous surface of the tile and grout. This makes future cleaning much easier.
- Inhibits Mold and Mildew: By reducing moisture absorption, sealers help to inhibit the growth of mold, mildew, and algae in grout lines and on porous tiles.
- Extends Lifespan: Protection from the elements and reduced staining contributes to the longevity of your outdoor tiled surface.
- Enhances Appearance: Some sealers can enhance the natural color of the stone, giving it a richer, “wet” look, while others are invisible.
Choosing the Right Sealer
- Tile Type Specificity: Always choose a sealer specifically formulated for your type of outdoor tile and grout. Never use an indoor sealer outdoors, as it won’t withstand the outdoor elements.
- Penetrating vs. Topical: Penetrating sealers soak into the pores of the material, offering long-lasting protection without changing the surface appearance significantly. Topical sealers form a protective layer on the surface, which can be more durable against abrasion but may change the tile’s finish and can sometimes peel or flake. For most outdoor applications, a penetrating sealer is preferred.
- Application: Apply the sealer after the tiles are completely dry (usually 24-48 hours after cleaning). Follow the manufacturer’s instructions diligently, which typically involve applying thin, even coats and wiping off any excess before it dries. Reapply sealer every 1-3 years, depending on traffic and exposure.
Routine Maintenance for Lasting Cleanliness
Maintaining your outdoor tiles doesn’t stop after the deep clean and seal.
- Regular Sweeping/Blowing: Keep loose debris, leaves, and dirt off the tiles. This prevents staining and mold growth from decaying organic matter.
- Immediate Spill Cleanup: Address spills as soon as they happen. The longer a substance sits, the deeper it can penetrate and stain.
- Hose Down: Periodically hose down the tiled area with plain water to remove surface dust and light grime.
- Light Scrubbing: For minor dirty patches, a quick scrub with a mild solution of water and dish soap can prevent the need for more intensive cleaning later.
- Check Grout: Inspect your grout lines periodically for cracks or deterioration. Address these issues promptly to prevent water from seeping underneath the tiles.
By following this comprehensive guide, you can restore your outdoor tiles and grout to their former glory and keep them looking their best for years to come.
Leave a Reply